Automating Shipping in Sage X3
In this blog, we’re highlighting another one of Sage X3‘s great features: automating tasks. This is an important feature because it allows you to automate the tasks a human would generally do.
In a perfect world, where the system would pick the actual lot numbers based on your rule, you could let the system generate pick tickets automatically after creating an order with a ship date close to its due date.
Once the pick ticket is complete and all the goods are in the staging area for packing and shipping, you can also automatically generate the packing slip and let the packers take care of the bill of lading.
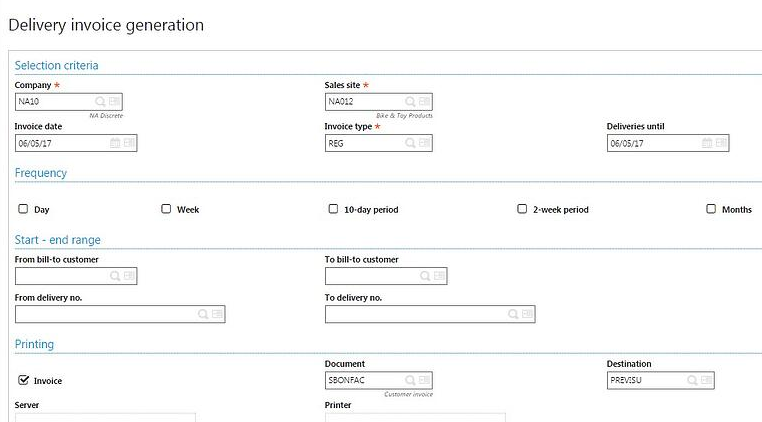
Finally, when the packing slip and all related shipping documents are ready to leave the warehouse, Sage X3 can automatically print the sales invoice and include it with the shipment.
In that scenario, the only human intervention necessary was generating the bill of lading, and that’s because bills of lading require the manual entry of certain information, such as the PRO or trailer numbers. Everything else can be handled using the batch tasks.
Here’s an example of how you would configure Sage X3 to handle automatically generating the pick ticket printed to the warehouse or created for handled users, then generating the delivery documents using another task and, finally, having the invoice printed directly after the delivery is created in Sage X3.
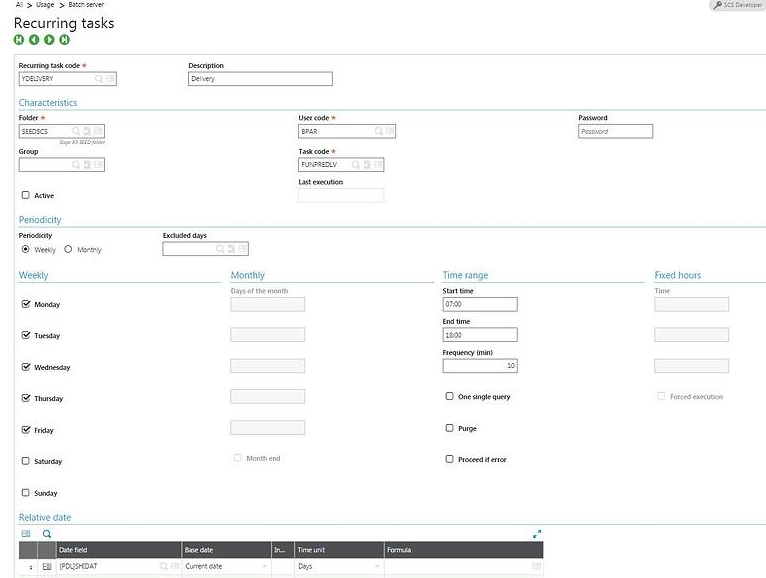
Pick Ticket
To schedule a task to run at certain times or time intervals, go to Usage > Batch server > Recurring task management.
A task is nothing more than the batch function put on a schedule; in this example, we’ll use the generation of preparation lists function found under Sales > Shipment preparation > Generate preparation lists.
The first thing you need to do is create the task:
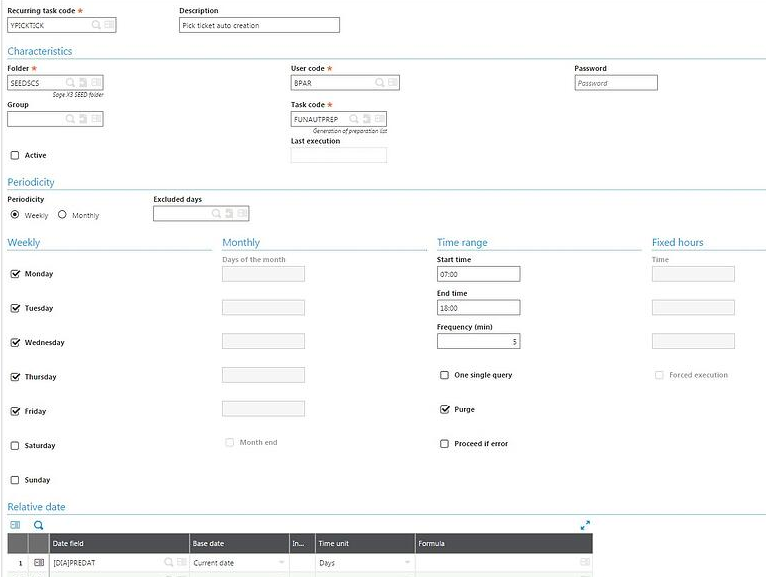
We’ll be running this task from 7:00 AM to 6:00 PM and, because some tasks are date-driven, you must specify which date the system should dynamically use at the bottom of the screen. (Reading our blog about formulas will help.)
Before you can make the task active, you have to enter the parameters for the function.
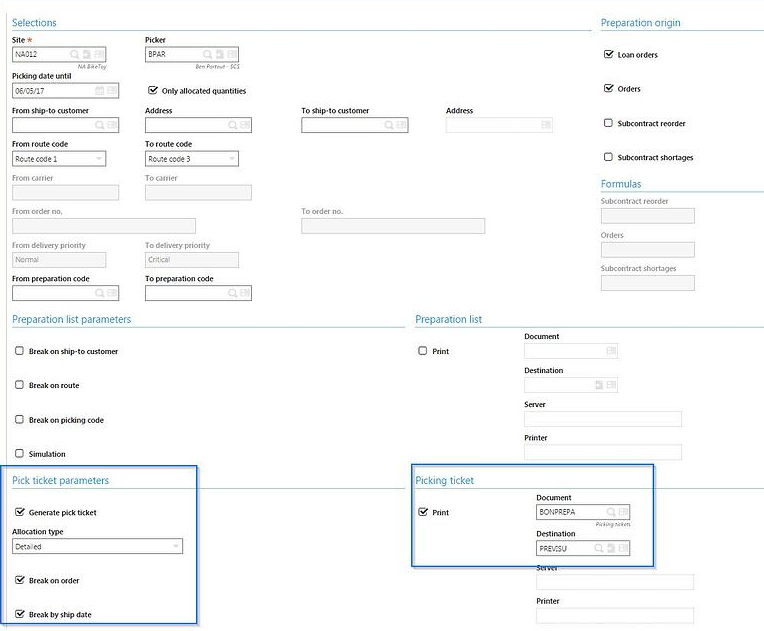
Here, we entered the information for the pick ticket to be generated as well as printed simultaneously so as to make their way directly to the printer in the warehouse.
That way, the pickers can get started.
Once all configurations are complete, don’t forget to make the task active!
Now you can schedule a task to generate the deliveries.
Delivery
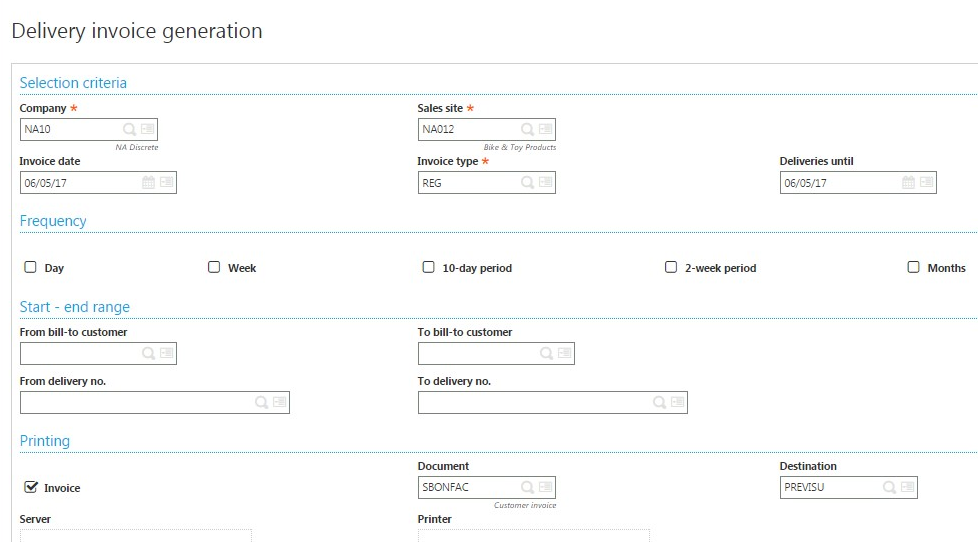
To create the deliveries, we’ll use the pick ticket deliveries function and use the delivery invoice generation function for the invoices part.
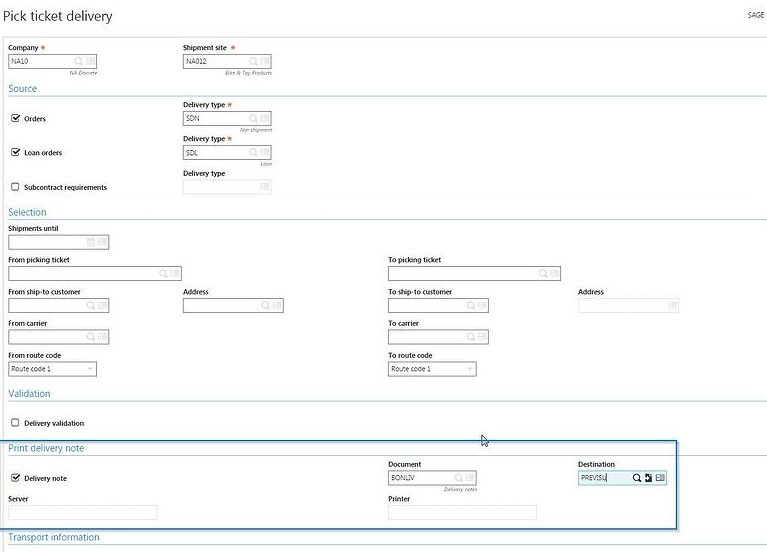
Please note that we didn’t click on the delivery validation, as this is the trigger for the invoice creation when the packers are done with their process.
Make sure the print delivery note is checked so the notification for the packers to start will be ready at their printers.
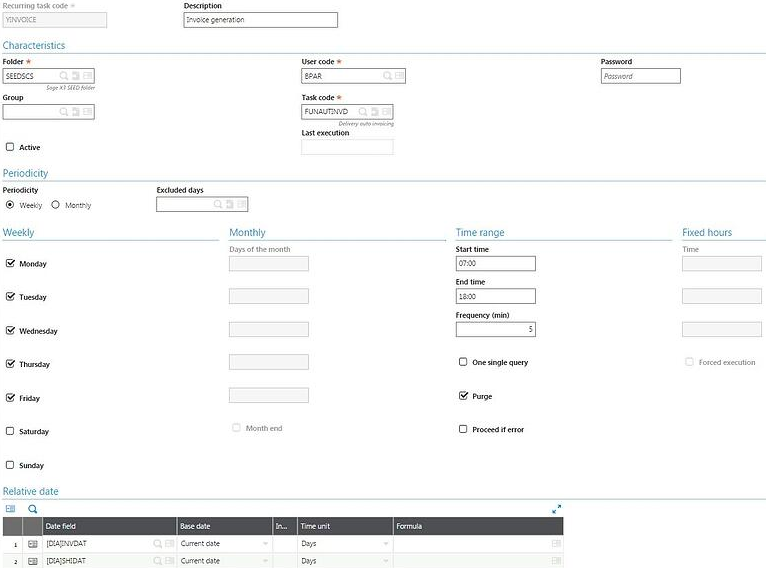
Invoices
Here’s how you could set up the invoicing piece.
Once the tasks are active, they’ll appear on the batch server.
Make sure your IT service is aware of the tasks so they can make sure they’re running when they restart the server for maintenance.
As you can see, Sage X3 allows you to set up recurring tasks to automate the mundane tasks others have to do manually when they have smaller ERP packages. This is one of the many ways Sage X3 can help you with segregation of duties but also with streamlining your shipping processing by removing several manual steps.
Please contact us for more information about automating shipping in Sage X3 or about the many software solutions we offer that can help your business.