
Sage 100 Newsletter – Q3 2020
Keeping You Up-To-Date With Information About Sage 100
Creating a Custom Field in Sage 100
By: Jane Amorim, Business Analyst / Consultant
 Creating your own fields in Sage 100 is the easiest and quickest way to enhance your ERP. Below we will go through the steps to create a new field and add it to a screen in Sage. In this example, we will create a field in Customer Maintenance for tracking the customers’ territory.
Part I: Add a New Field (UDF) to the Sage Database:
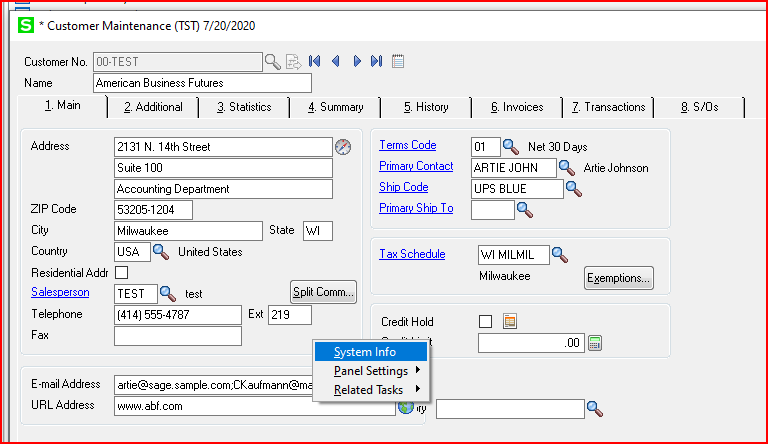
- First, we must determine the table in which to add our new field. To do this, open the screen on which you’d like to add your new field. In our example, we’re using Customer Maintenance.
- Right click on a blank area of the screen, select System Info, and then note the name of the “Current File.”
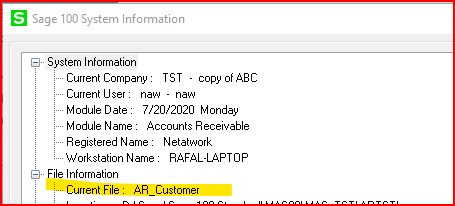
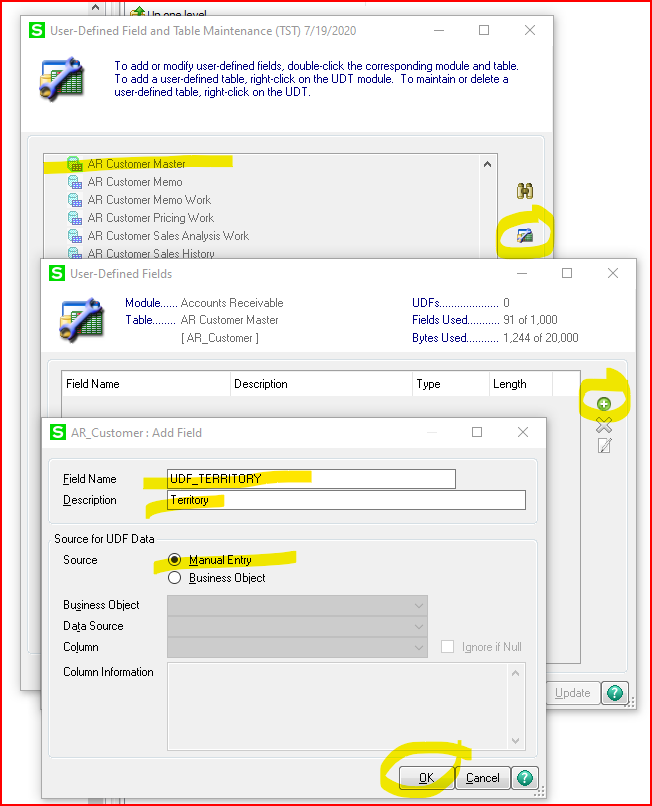
- Then, open User Defined Field and Table Maintenance and select the matching table, though the name may occasionally vary very slightly (in this case: AR Customer Master).
- Highlight the table and click the “Edit Fields” button.
- Click the “+” button
- Enter a name of your new field
- Keep the “Manual Entry” radio button selected and click “OK.”
- In the next screen that appears, choose the Multi-Line option to create a simple text box field where you can enter text without validation or a drop down list, etc. (We’ll cover validation in the next installment.)
- Enter your field length and select one of the field types: string (which is text), numeric, or date.
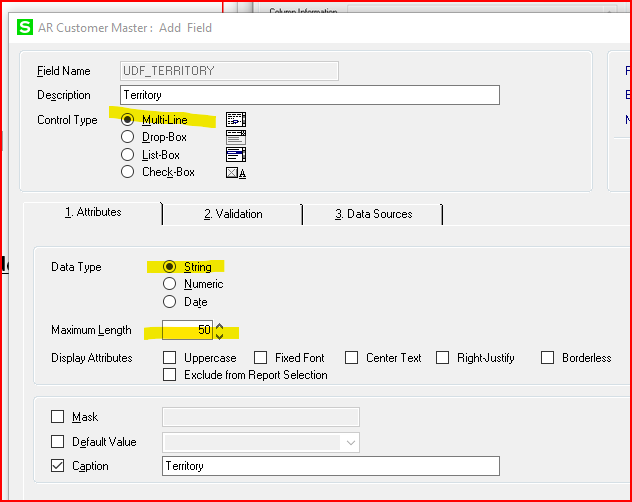
- Click OK, then OK again (to update the database) and then Close to return to the main menu.
Part II: Add Your New Field to the Screen
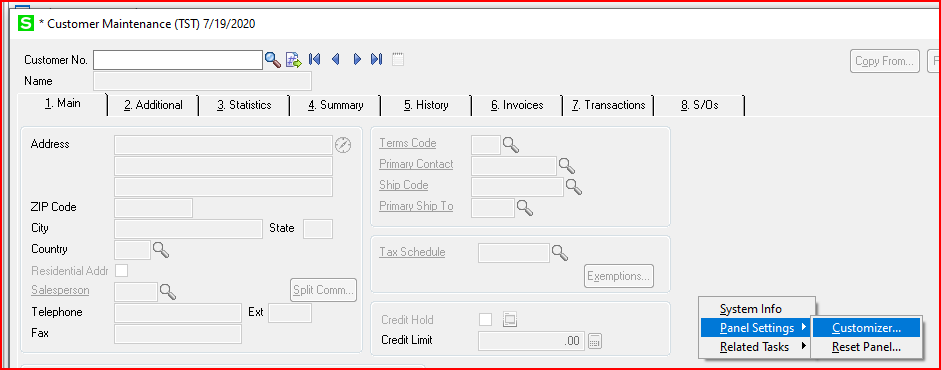
- Open the screen where you’d like to add you new field.
- Right click on the screen until you see a pop-up menu with the “Panel Settings” option.
- Select “Customizer.” (Alternatively, you can open Customizer from Custom Office>Main>Customizer Selection.)
Note that you will need role security permissions to access “Customizer.”
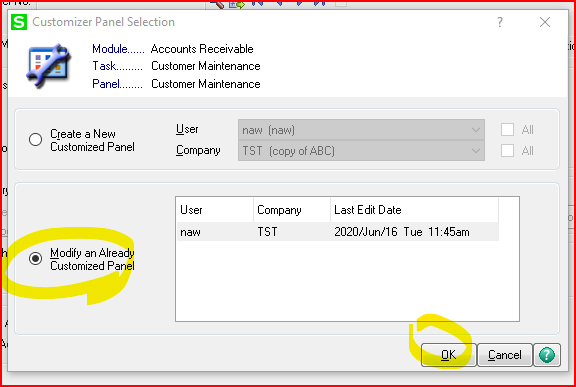
- From the next screen you will have the option of creating a new custom screen (aka “Panel”) or modifying an existing one (if any have already been created previously).
Note that custom panels may be created for all users and all companies, or specific users and/or specific companies.
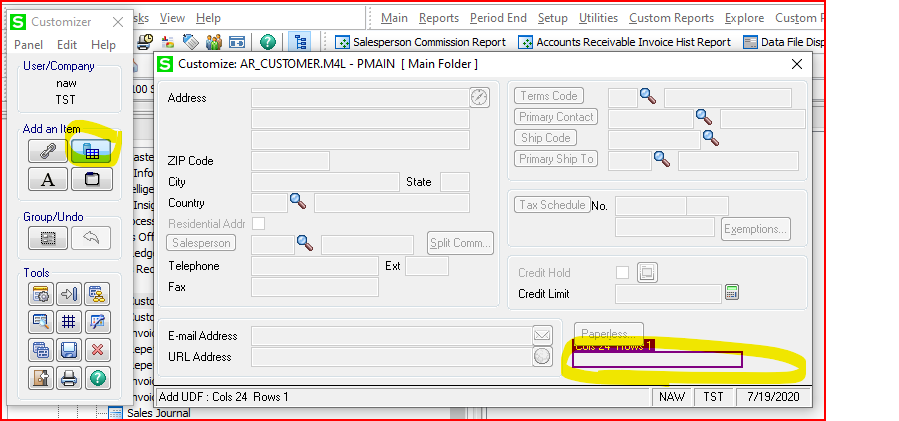
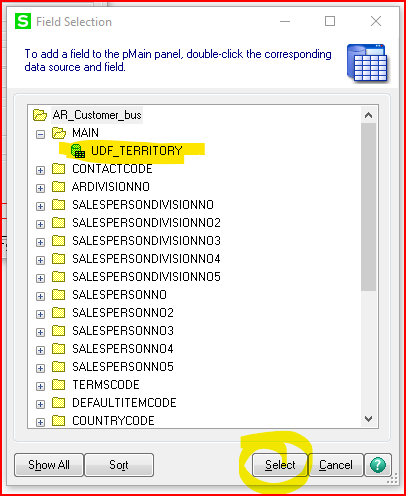
- Next, click the “Add Field” button and select your new UDF from the list that appears.
- Close the Customizer screen and save your changes when prompted.
Now that you’ve seen how you can add custom fields to screens in Sage, you’re ready to add some validation and selection lists. Stay tuned for that in the next installment!