Sage X3 Newsletter – Q1 2019
Keeping You Up-To-Date With Information About Sage X3
Sage Enterprise Intelligence (SEI) – Adding A New Field to A SEI Design Process & Report View
Before getting started working with the below Sage Enterprise Intelligence product functionality – please use caution. Always make changes in the PILOT folder test and if working properly copy to LIVE, never make change directly to LIVE before testing. If necessary, seek our assistance, or that of your network administrator.
SEI has an abundance of out of the box, design processes and views. Unfortunately, not every field that you need has been added to the process, therefore it may not be an available selection to add to your reports.
In this article, we show an example of how to add a new field to a design process, followed up with adding it to the report view.
Sage Enterprise Intelligence for Sage Enterprise Management
Recommended Pre-Requisite:
To complete the steps below, it is recommended that you have the knowledge of finding tables and field names in Sage Enterprise Management (EM).
Please refer to our December 2018 newsletter for additional information: “Tips and Tricks: Finding Tables and Field Names in Sage Enterprise Management”
Let’s start with some definitions:
- Design Process: A design process is a SQL arrangement of tables from your data source (EM) that includes two main sections.
- Section One: SQL arrangement view of tables and links.

- Section Two: Defined fields from the SQL arrangement that will be used in reports, views, and dashboards

- Report View: A report view is created based on your defined process.
- Report and view will be used interchangeably throughout this article.
Example:
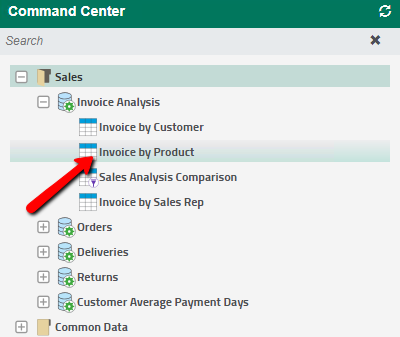
Company A is interested in adding a new field, Product Stat Group to the Invoice by Product view that is not on the design process or view.
Below are the steps to add new fields to a design process.
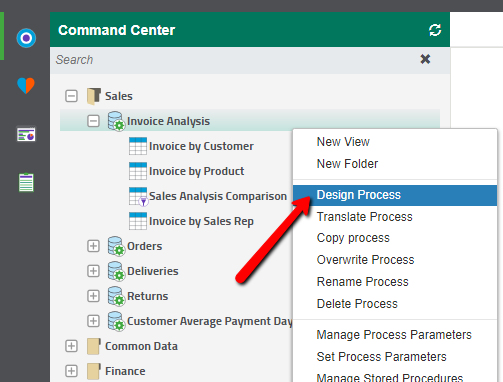
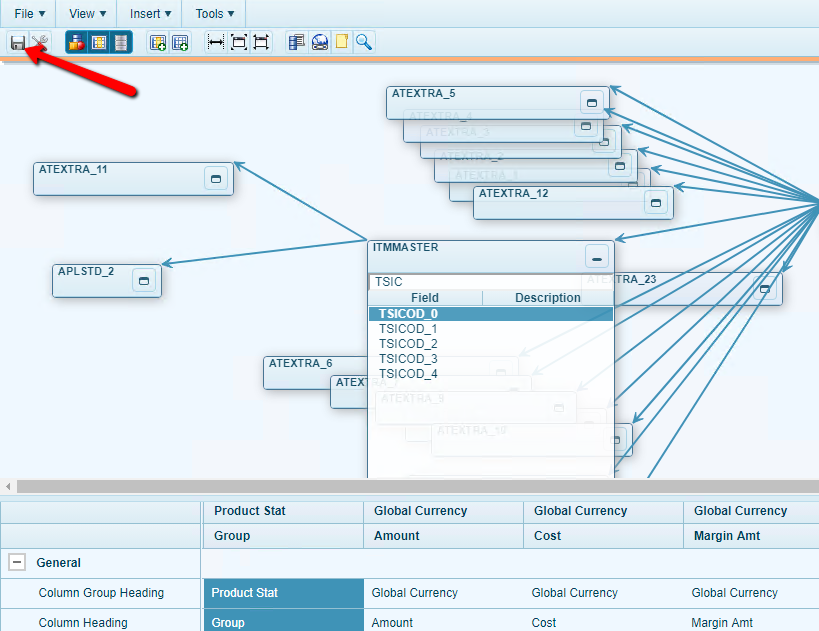
- Navigate to the Command Center
- Right click over the design process (our case, Invoice Analysis) that you want to add the field
- Locate the table that contains your field in the top section of the design process
- ZINVOICE
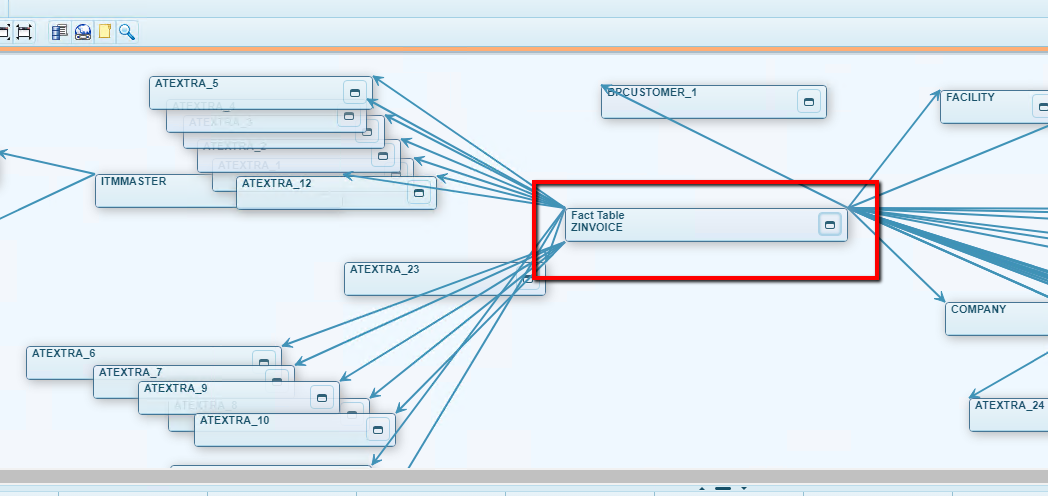
- Click on the
 to see the available fields that are located in the table
 - “Scroll” or “Search” for the field that you are adding to the report
- TSICOD_0 -> This is the product stat group 1 field
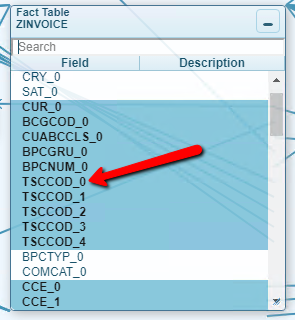
- Double-click on the new field,
- It will be added to the bottom field section of the design process as the furthest right column
- You can click and drag on the ‘TSICOD_0’ to move the location of the column (Optional)
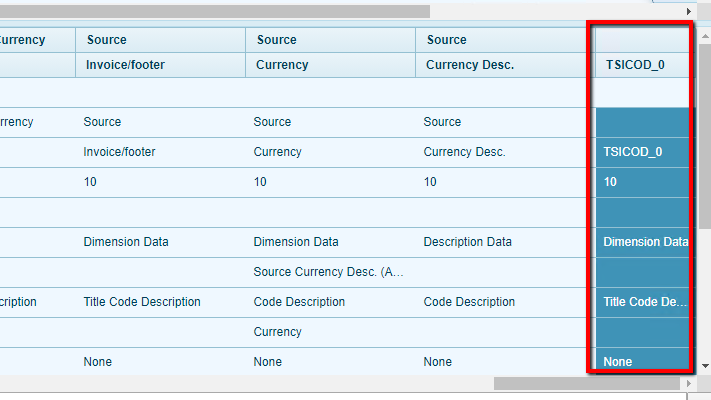
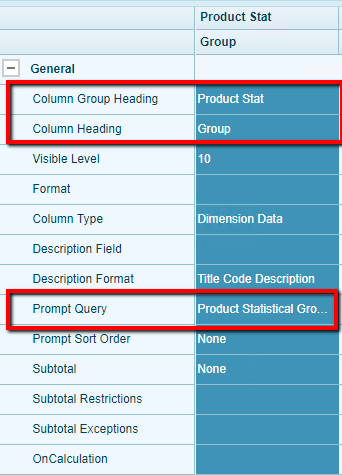
- Modify the field that you have just added based on your needs for the view (OPTIONAL)
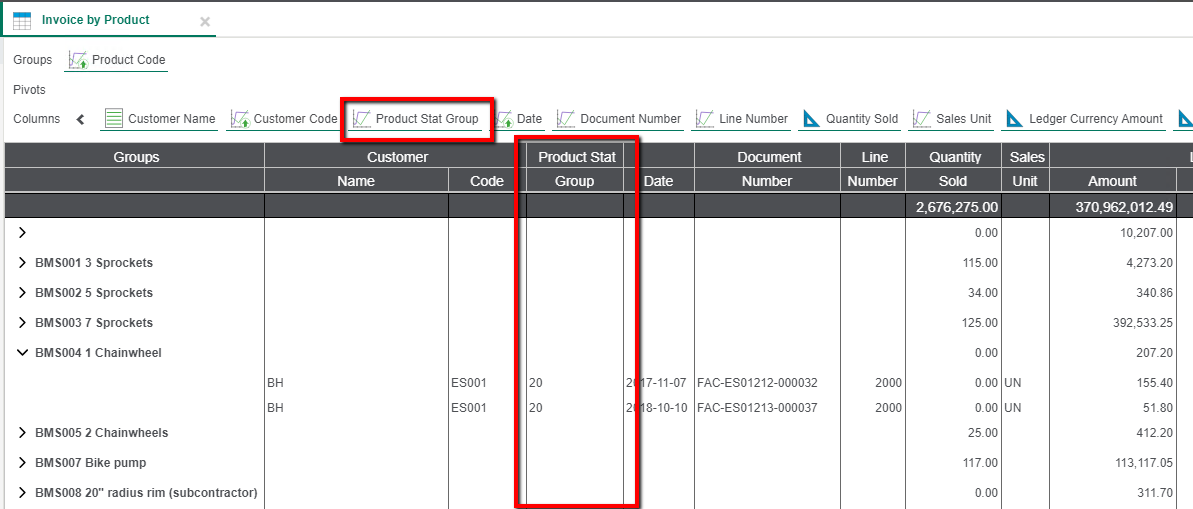
Column Group Heading: Product Stat
Column Heading: Group
Prompt Query: Product Statistical Group 1
- Select ‘Save’ in the top left corner
- The field has now been successfully added to the design process
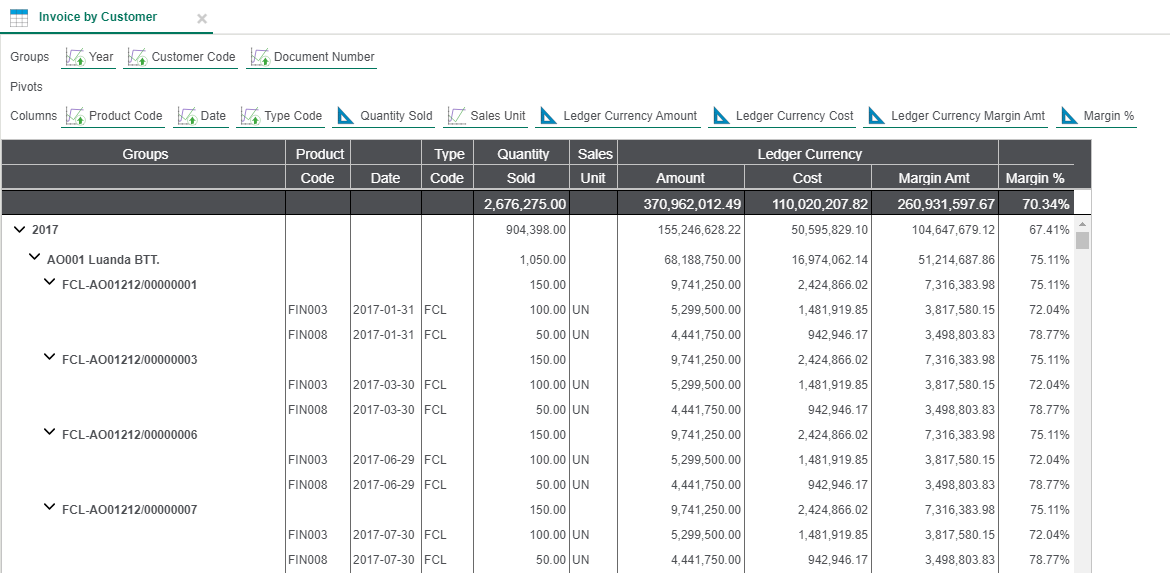
Next Steps, add the new field to the report view (Two Methods)
- Select the view that you want to add the new field
- Invoice by Product
First Method
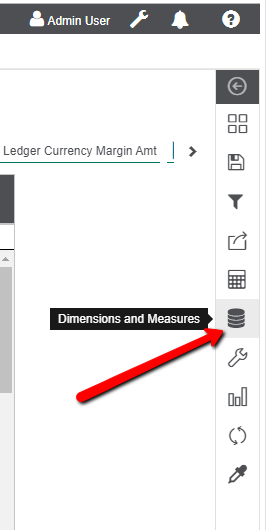
- Click on the ‘Dimensions and Measures’ Icon on the right panel bar
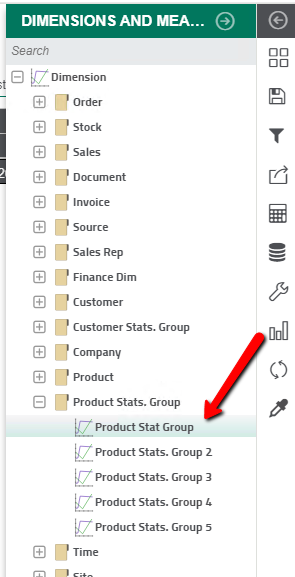
- Search or ‘Open’ the Column type to locate the field
- Click down on the new field, ‘Product Stat group’ and drag it to either ‘Groups’, ‘Pivots’, or ‘Columns’
- I will be dragging to ‘Columns’

- Click down and drag field to the ‘Columns’ row to place in desired location for the view
- Click on the save button on right panel bar
- You have now successfully added a new field to the report view
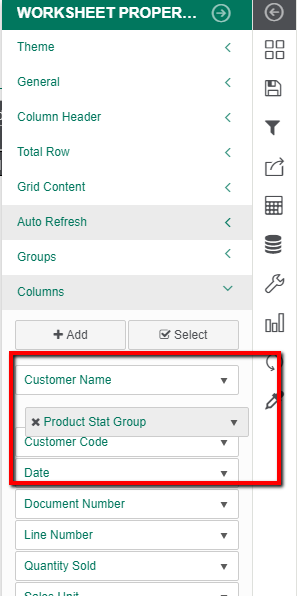
Second Method
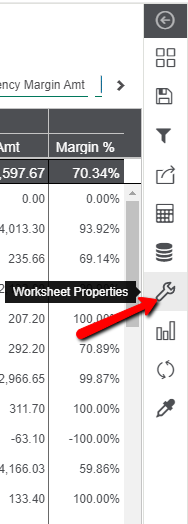
- Click on the ‘Worksheet Properties’ Wrench Icon on the right panel bar
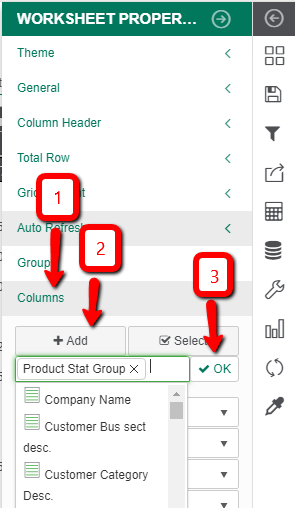
- Select ‘Columns’ then ‘+ Add’
- Locate and select the new field, Product Stat group
- Hit ‘Ok’
- You can move the field order on how it is displayed on the report within the Columns section by “Click down and drag”
- Save the view, and you have successfully added a new field to the report