Sage X3 Tips: How to Configure Sage X3 Screens
 Before getting started working with the below Sage X3 product functionality – please use caution. Always make changes in the PILOT folder test and if working properly copy to LIVE, never make change directly to LIVE before testing. If necessary, seek our assistance, or that of your network administrator.
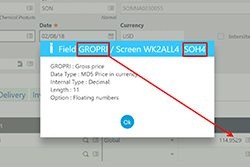
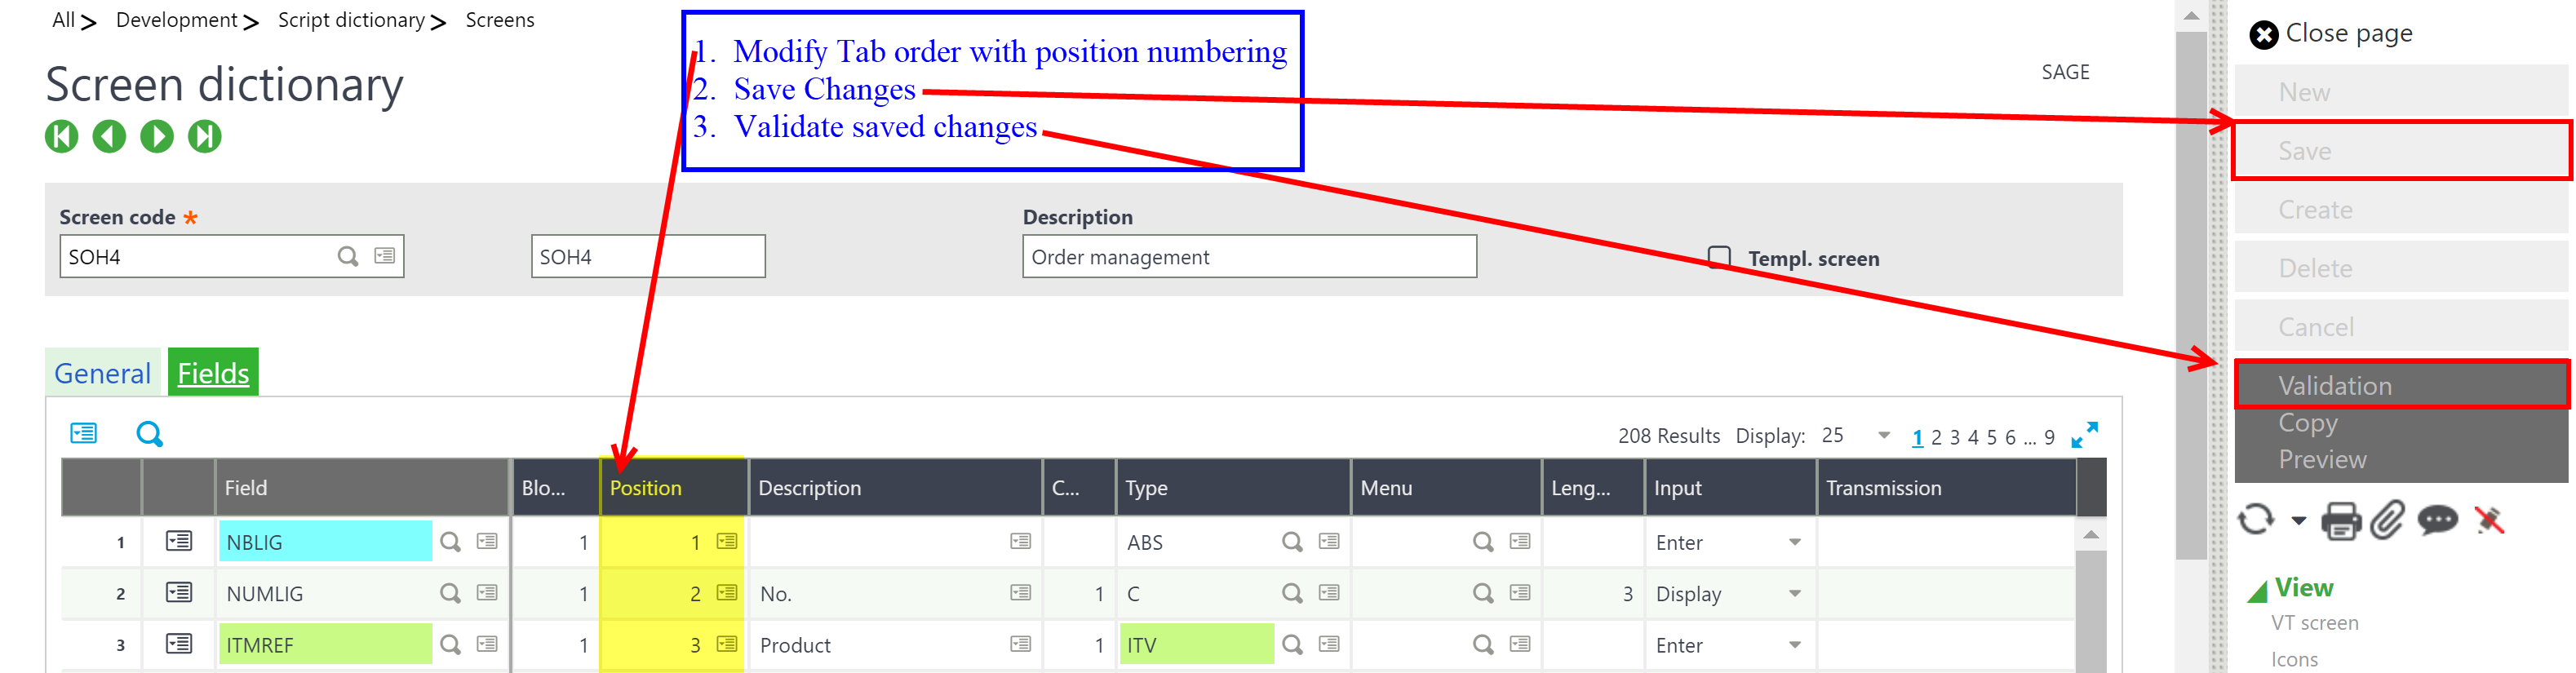
The following is an example of the process for making Admin changes to the screen in Sage X3 (Sage Enterprise Management) that controls the sales order line. This process is the same for other screens; to lookup a field value and screen code simply enter the function to which changes are required, select the field that will be changed, and select ESC + F6. This will display the screen below:
Note: Screen names beginning with “W” are system generated and should not be modified. Changes made to these screens will be overwritten when the associated screen or Entry Transaction is validated.

Example:
- The abbreviation for the Sales Orders lines screen is SOH4.
- There is one SOH4 screen for each Transaction Entry.
- The base screen code is SOH4 and is not associated with a Entry Transaction.
- The Standard Entry Transaction screen code is WK2STD4.
- Screen modifications should be made to SOH4 and not WK2STD4.
To change the tab order of the fields in the sales order line entry begin by:
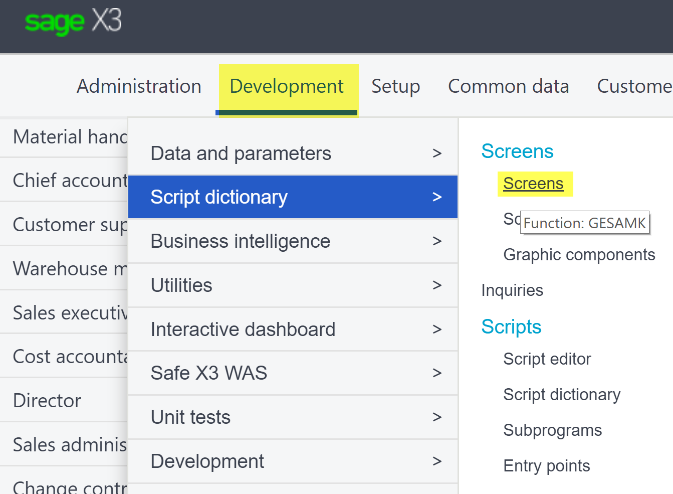
- Following Development > Script Dictionary > Screens > Screens
- Select screen SOH4
- Select the Fields tab
- All the fields and their numeric position control the tab order on the line
- Save changes once ordering is correct
- Validate Changes
Note: Block #1 is the sales order line, if making changes to other screens it is important to be mindful of the block numbering in addition to the position number.
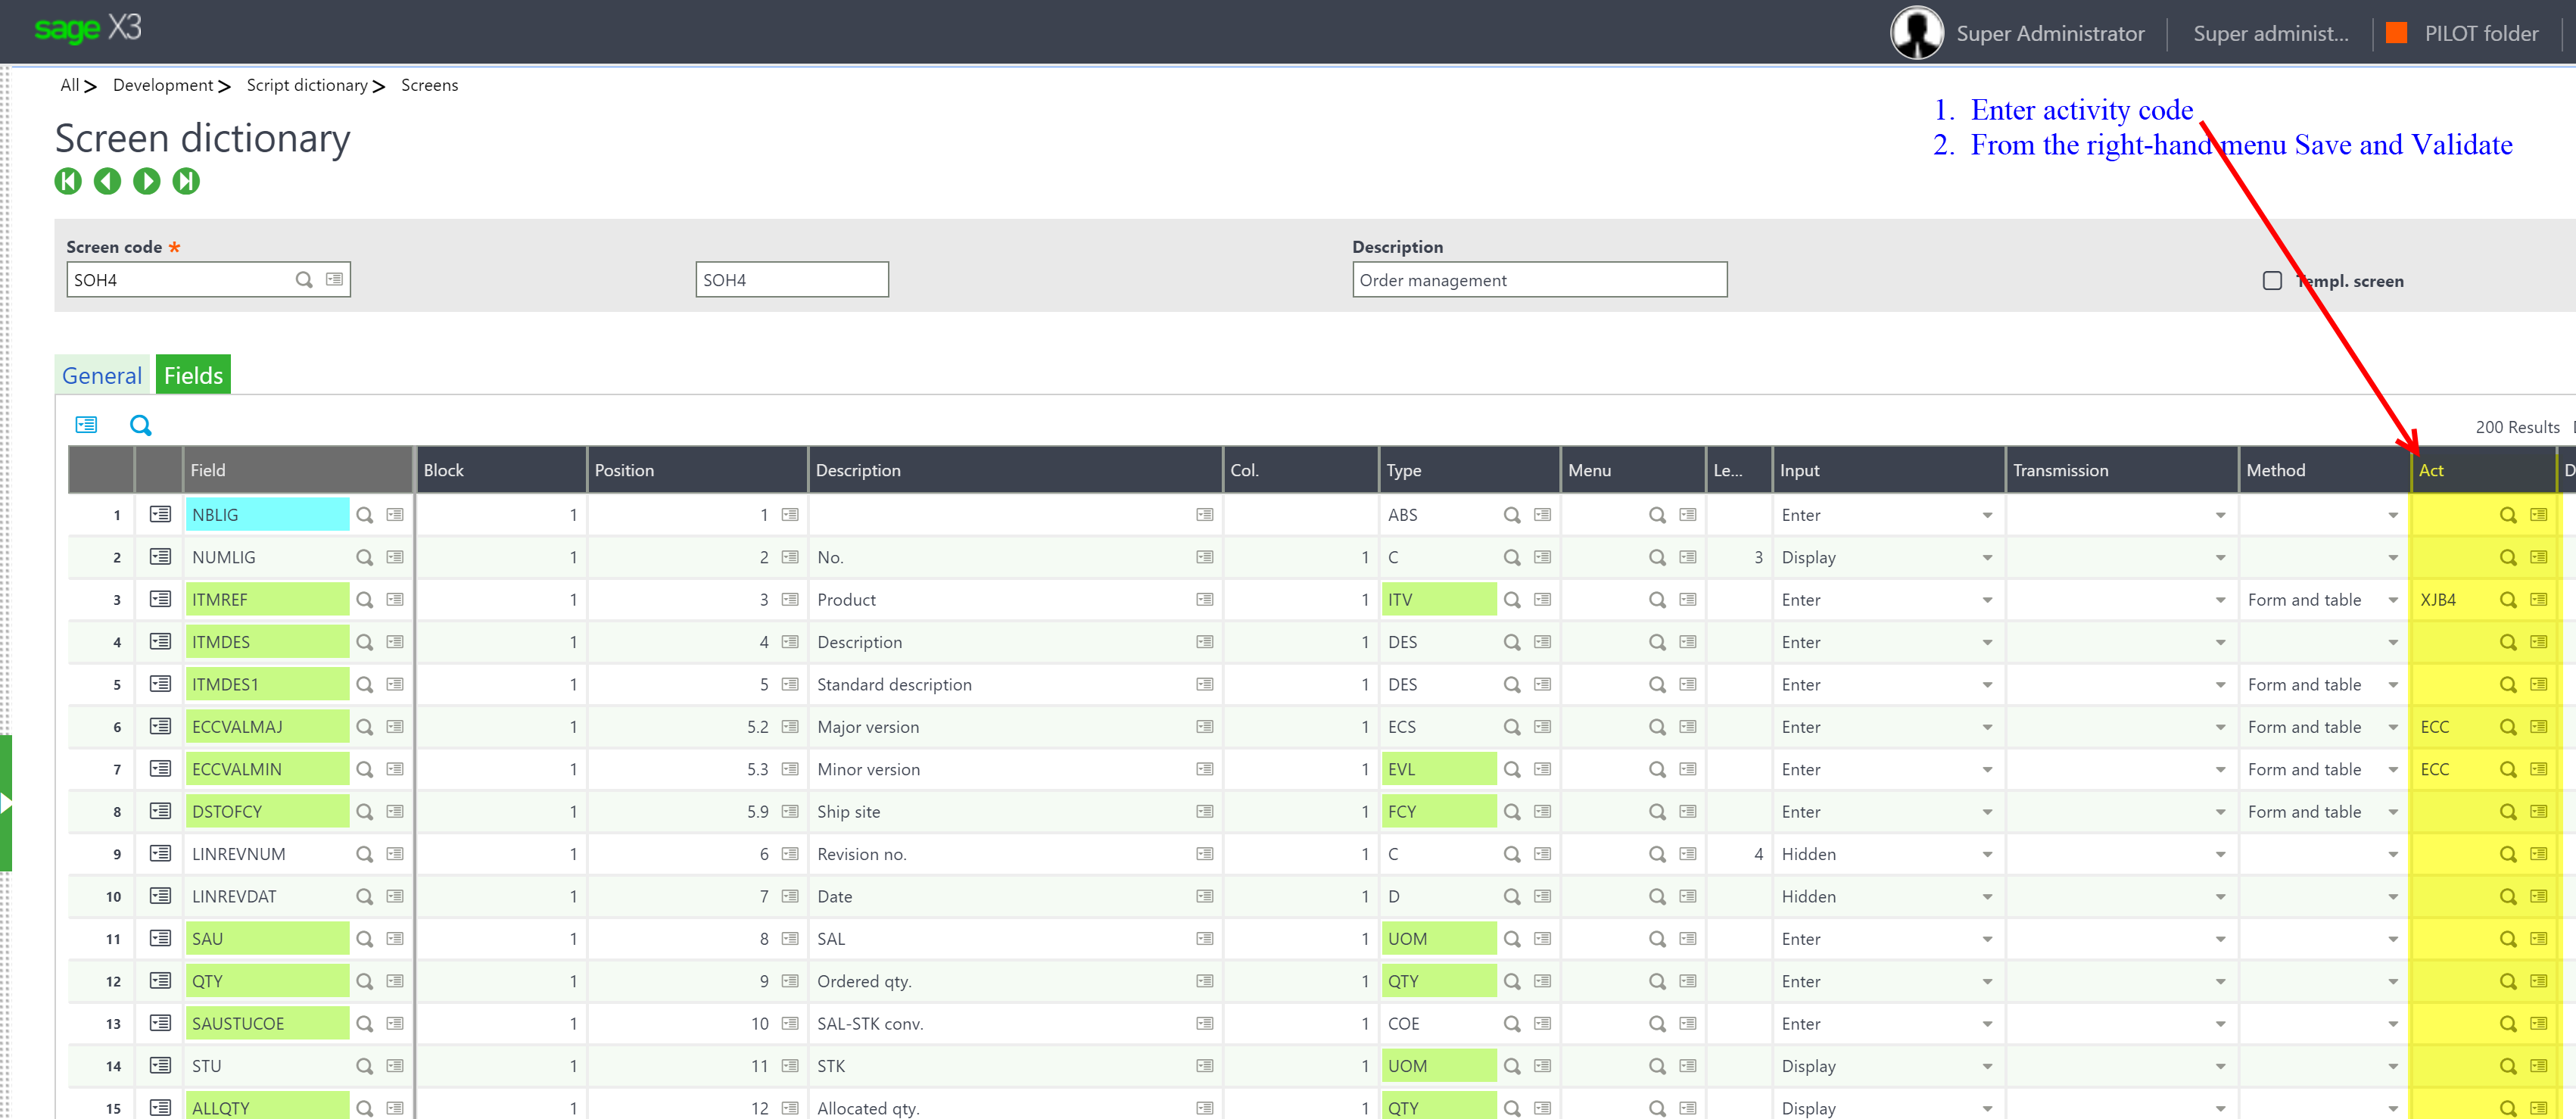
To ensure these changes are not lost during an upgrade of Sage X3 (Sage Enterprise Management) it is important to use an activity code on each line that is modified. If you have not done so already, create a new generic activity code by using the following steps:
- Select the action card in the column titled activity.
- Select new.
- Enter a code beginning with “Z” this is an easy way to identify changes made by users rather that changes from Sage patches and upgrades.
- Select save and close the window.
- Enter this code in the “Act” column of the line that has been modified.
- Save and validate changes.
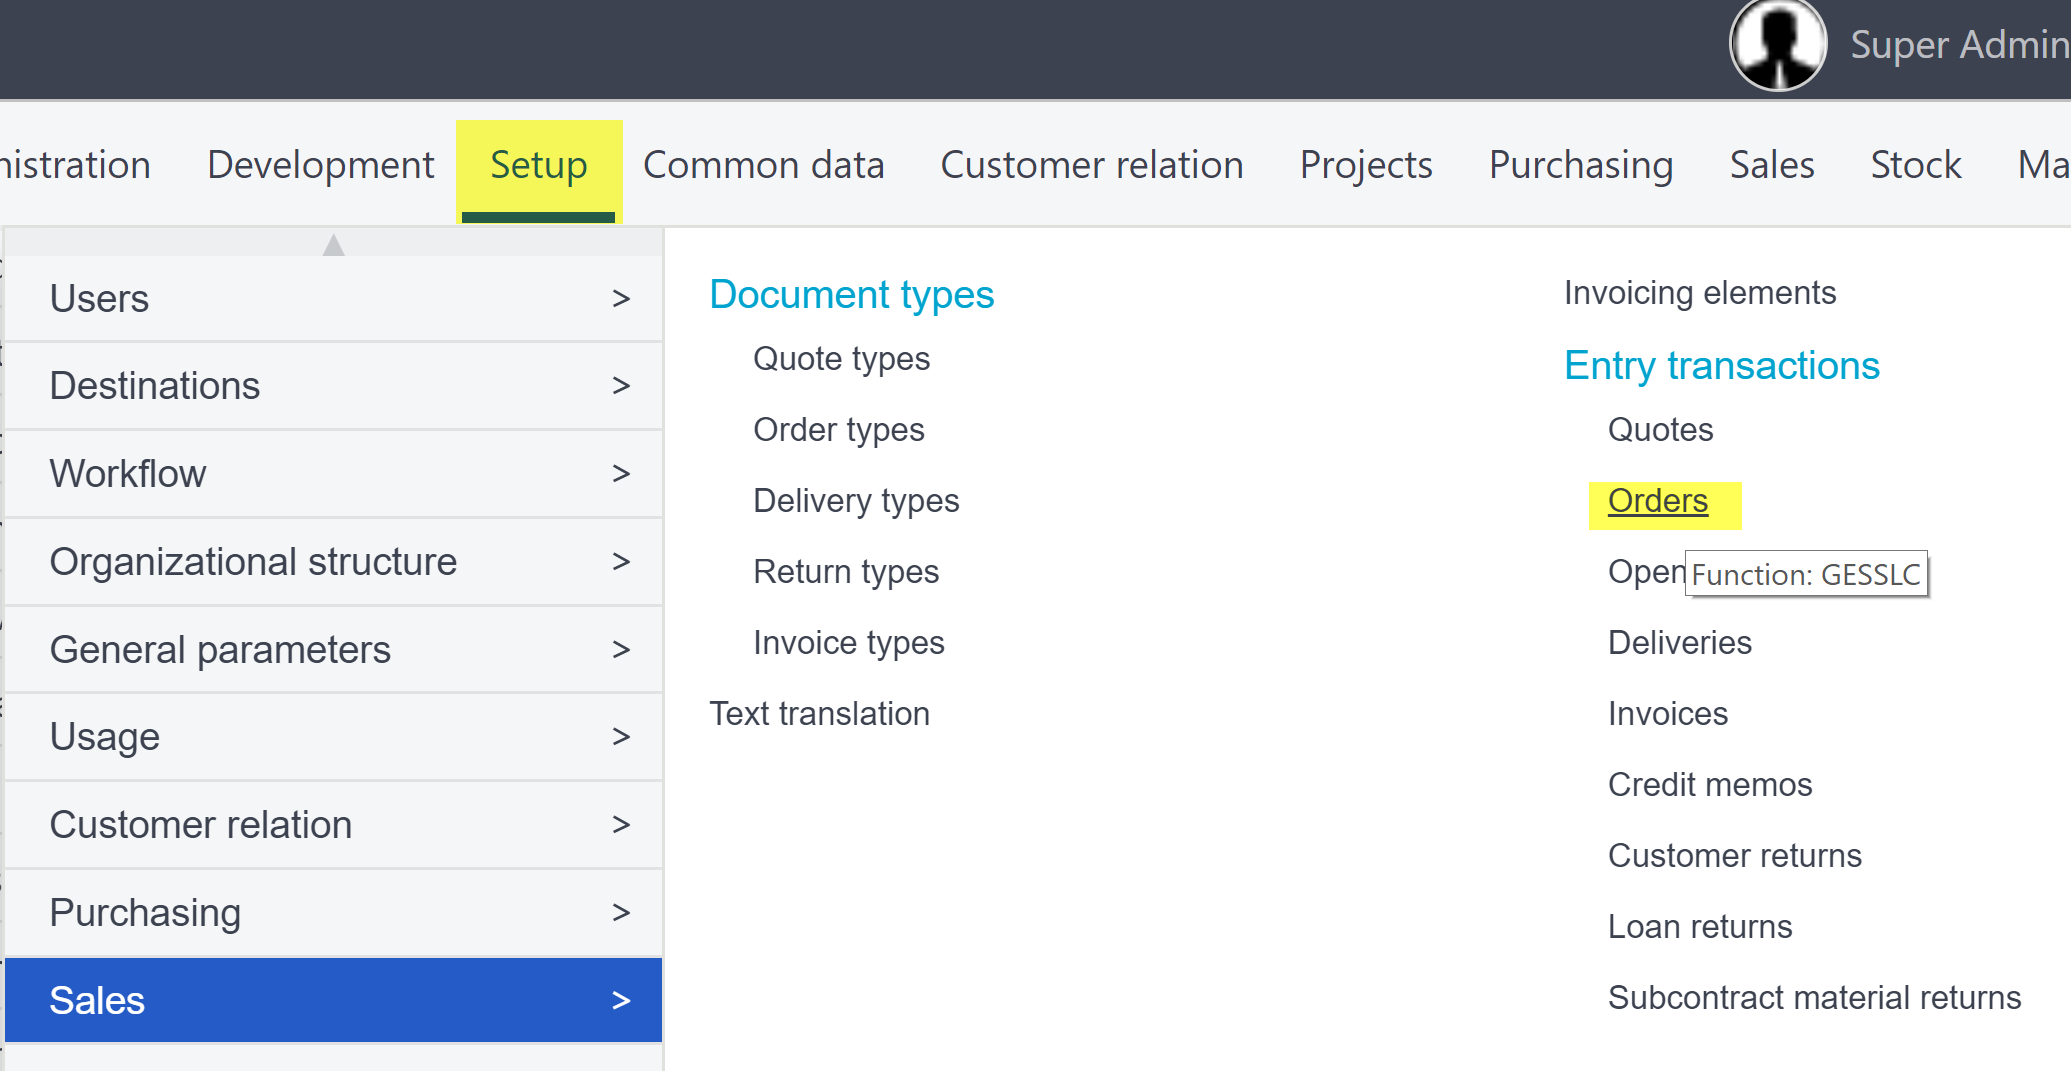
Finally, to ensure that these changes are copied over to the entry transactions:
- Follow Setup > Sales > Entry Transactions > Orders
- Validate all entry transactions that are being used and/or active.