
Have you ever been in a situation where one of your customers placed a purchase order (PO) for items you don’t keep in inventory at your current location but do at another of your locations? In most systems, this is a scenario that requires many transactions to get the goods delivered to your warehouse and, ultimately, to your customer. Luckily, setting up intercompany transactions in Sage X3 is easy.
First, you need to create the customer PO, then create a PO to your other warehouse to request the goods from them. Then, they need to create their own sales order (SO) to pick, pack, and ship the required good(s).
Without entering the corresponding customer PO number on all documents, you will lose traceability and not know how each transaction ties together. In some instances, you may receive these parts and not know why or who was meant to receive them.
With Sage X3, however, creating these transactions (PO to the warehouse and SO to pick, pack, and ship) is as simple as clicking one button on the customer PO.
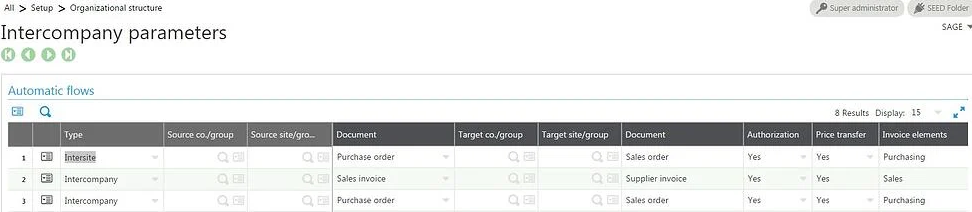
To create this environment, you will need to set up the intercompany transactions in the intercompany function.
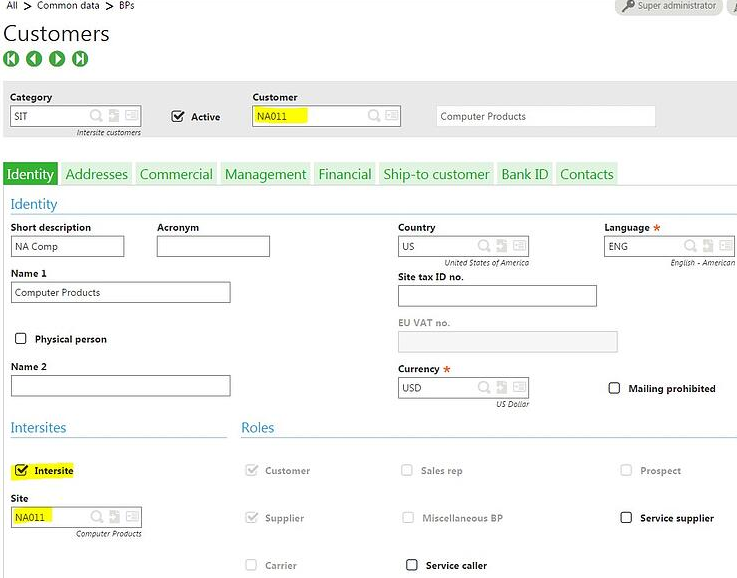
Then, you need to create the warehouse providing the goods as a vendor and your own site as a customer. Finally, make sure that the primary supplier for this part is the supplier you created previously.
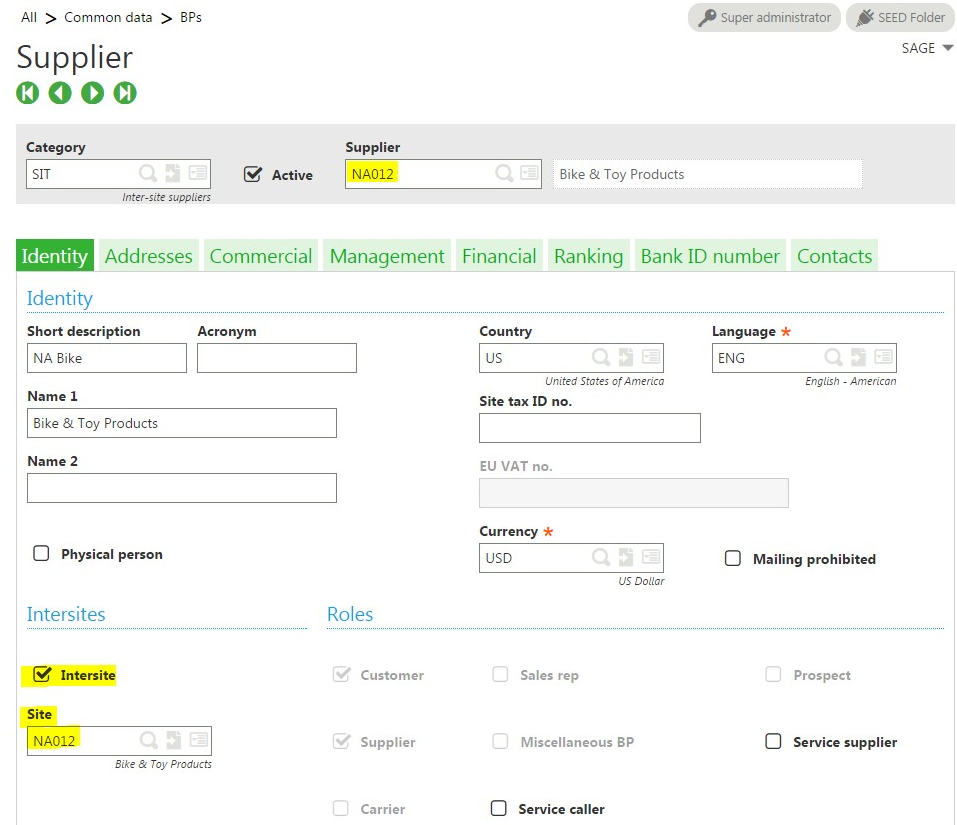
This is the vendor:
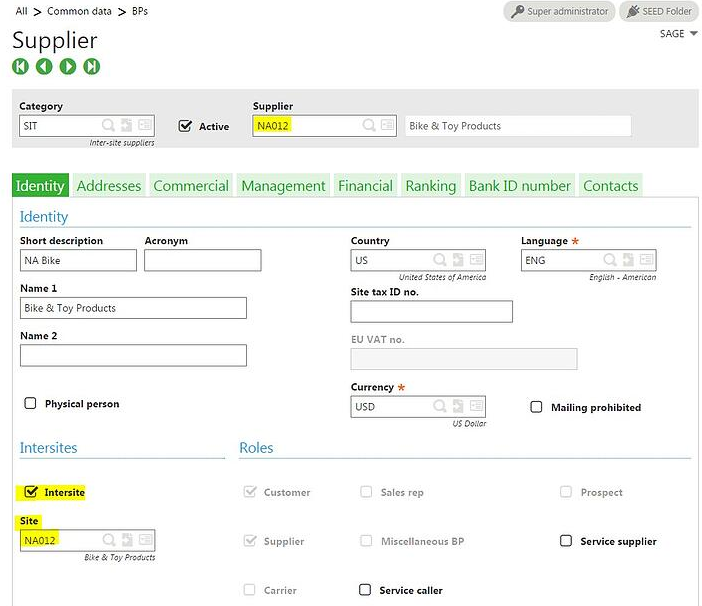
The highlighted fields in the bottom left corner of the above screenshot are to specify which site is related to the supplier code you created; it’s good practice to make the supplier code and the site code the same for clarity purposes.
This is the customer:
This is the ship-to address for this customer:
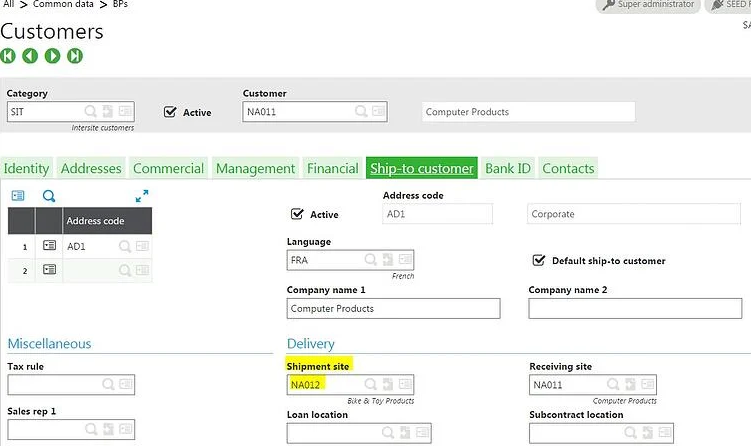
Note that the shipment site where you ship the goods from is the supplier site you previously configured.
This is the part number with its vendor:
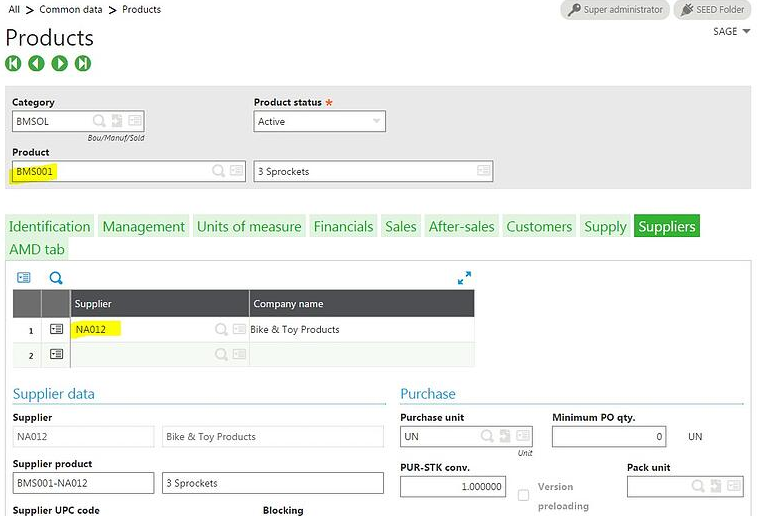
Make sure there’s associated pricing for the PO, or it won’t be created successfully.
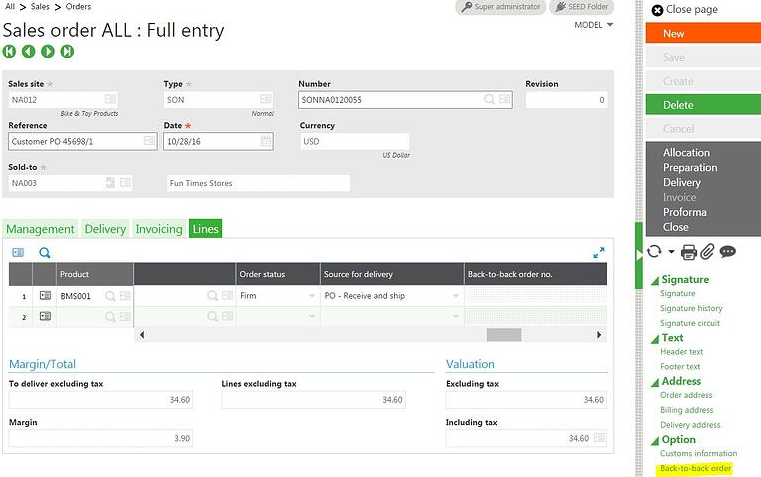
First, enter the customer PO.
The trick is to make sure that we won’t be pulling our inventory from stock but rather generating a PO for it and transitioning it to our warehouse first.
On the SO line, there’s a field called “Source for delivery” that manages this behavior. Instead of stock, we’ll use PO – receive and ship. Literally, we’ll first receive the goods into our warehouse and ship them to our customer: receive and ship.

Make sure you don’t default quantity to allocate at the line level. If you do, the system will assume you want to pull from stock.
The only thing left to do at this point is to hit the back-to-back button in the right panel of the SO.
After hitting the back to back button, a log should display with the different transactions that were created.

This log tells us that from SONNA0110096, we generated PONA0110066.
Because of the way Sage X3 is designed, the PO that was automatically generated also created a corresponding SO in the supplying site; that way, the other warehouse can pick, pack, and ship based on a document that is tied to the PO.
The line of our original customer PO now shows the PO that was generated by pushing the back-to-back PO. If we drill down to our PO from this screen, we can take a look at the PO that was generated. Drilling down is as easy as clicking on the action button of the line and clicking on the PO number.
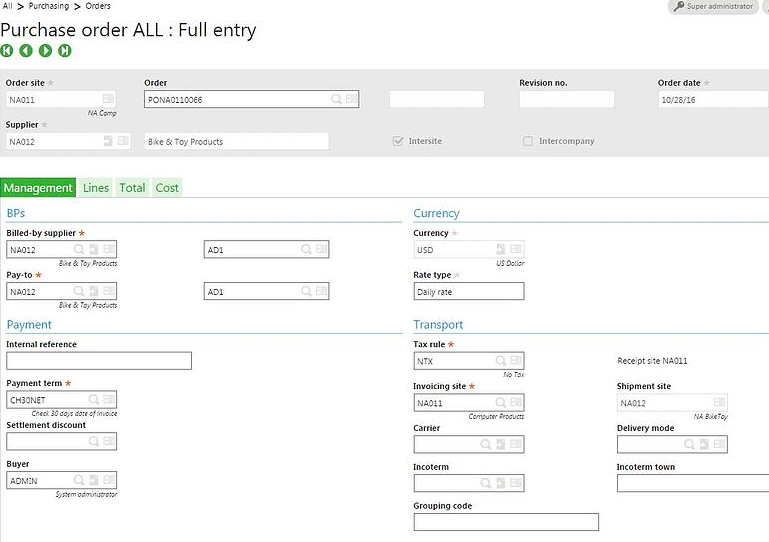
This is the first tab of the PO:
And this is the line that was generated:
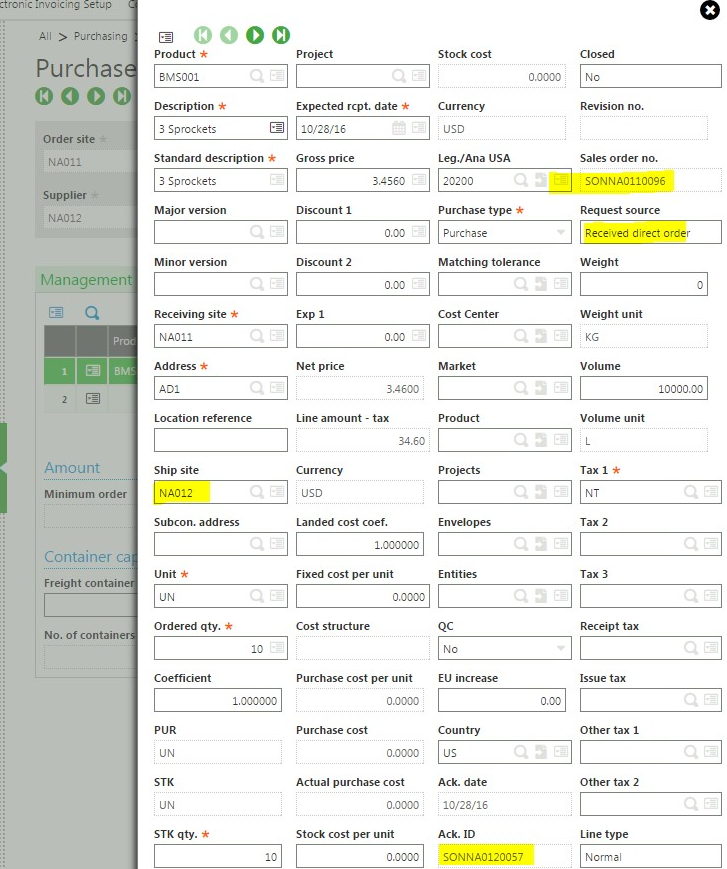
Notice the SO number this PO is tied to. The one at the top right represents the original customer PO that generated this PO. The one at the bottom represents the SO that was generated in our warehouse, so they can pick, pack, and ship against it.
Then let’s take a look at the SO that was automatically created for the warehouse.
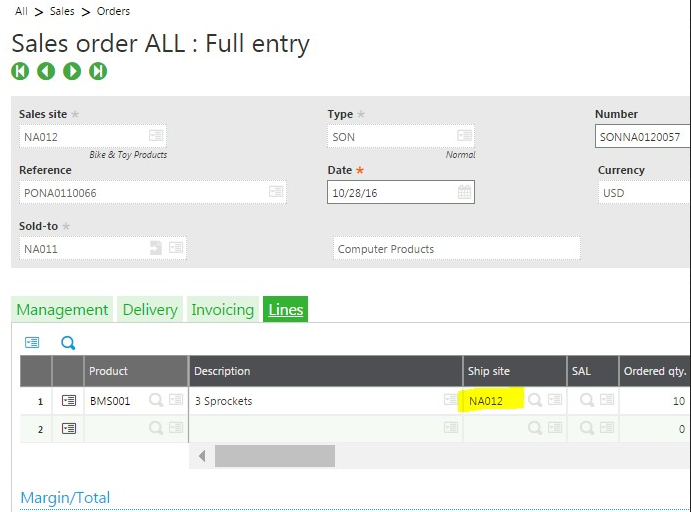
Notice that the SO will be shipped from NA012, as specified during all our configurations.
Hopefully, this blog post will help alleviate some of the pains associated with entering all these POs and SOs manually. If you have any questions about the process of setting up intercompany transactions, please contact us so we can help.