 How to Use Conditional Formatting in Sage X3
Sometimes it can be difficult to see patterns and trends when you look at raw data. Visualizing your data with tools like conditional formatting can help make patterns and trends more obvious and make your data easier to understand. Conditional formatting allows you to create rules that determine the format of cells based on their values.
In this blog post, we will show you how to conditionally format fields throughout Sage X3, based on the criteria we set up.
CONDITIONAL FORMATTING IN SAGE X3
Step 1
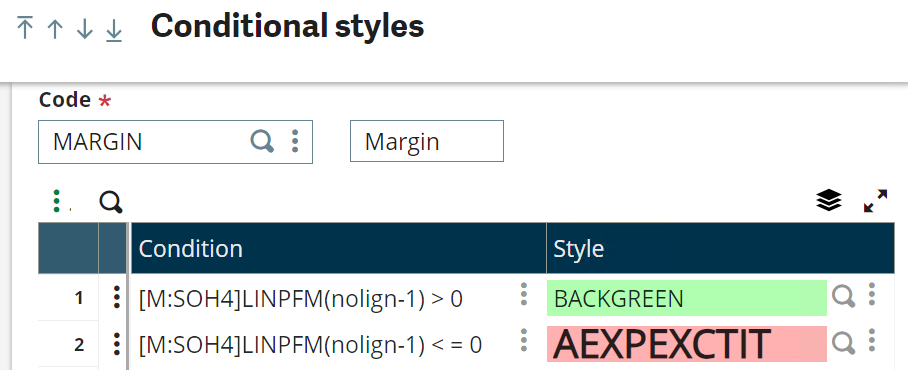
Define the criteria and the style. Enter a unique code, enter a description, and fill out the lines accordingly.
In this example, we have the following logic:
- Line 1: If the margin is greater than zero, then the gross price will appear in a green shade.
- Line 2: If the margin is less than or equal to zero, then the gross price will appear in a red shade and larger text.
Step 2
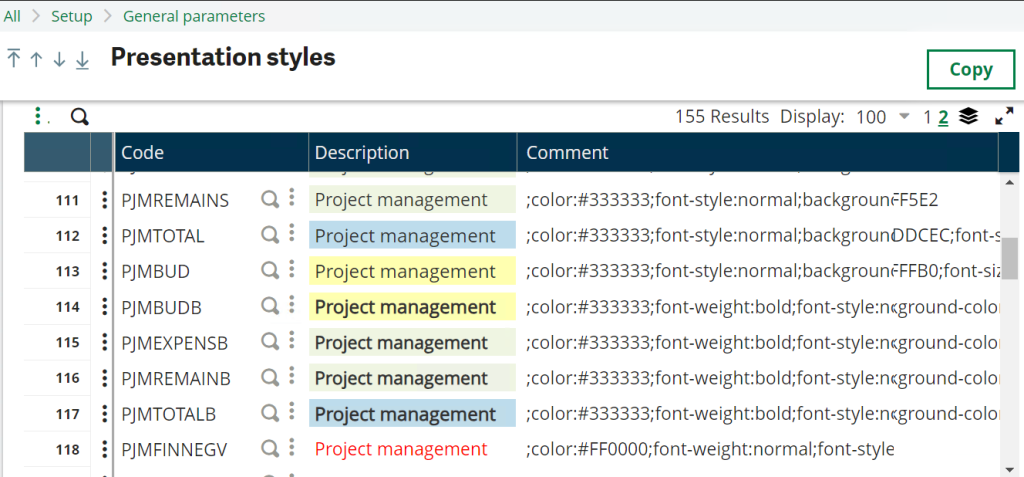
There are other styles that you can choose from. Select the lookup to try out other examples. Alternatively, you can go to Setup > General parameters > Presentation styles
Step 3
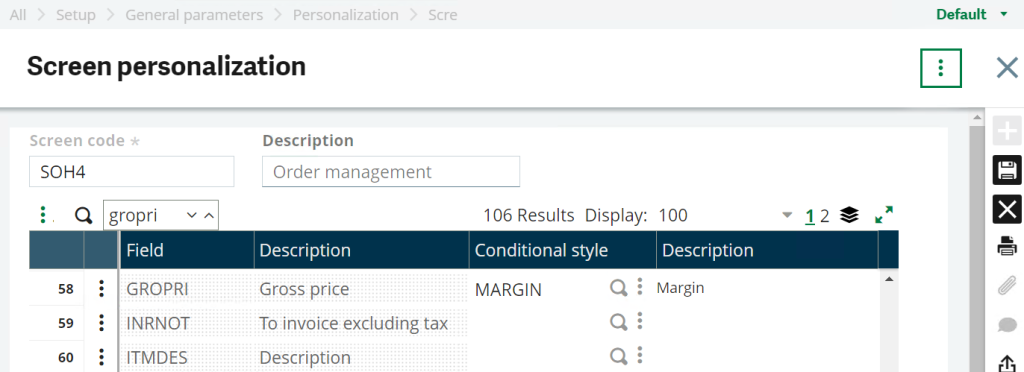
Assign the style to the field. Go to Setup > General parameters > Personalization > Screen > Screen personalization. Enter the screen code. Assign the style to the field.
Step 4
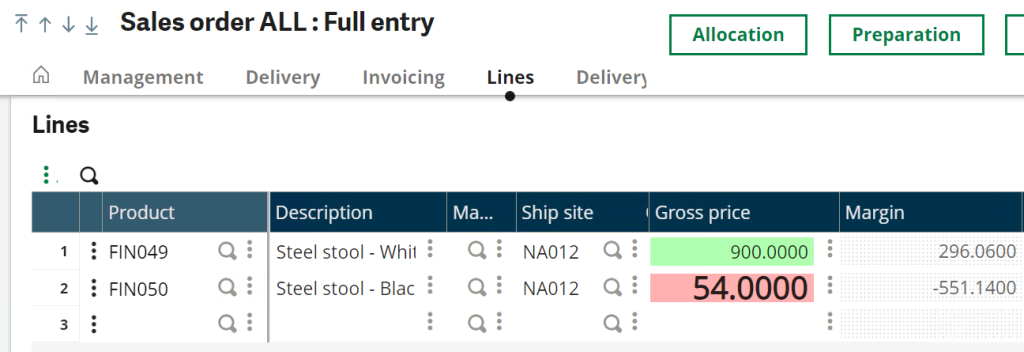
View the style in action. In our example, the gross price will be green if the margin is greater than zero, otherwise, the gross price field will be red.
For more information on using conditional formatting in Sage X3, or for any other Sage X3 questions, please contact us.