 Sage X3 Payment Approvals
In today’s blog post, we will illustrate methods to achieve improved segregation of duties, thereby enhancing security and control in the payment processing workflow within Sage X3. The goal is to minimize errors and ensure a more robust payment management system.
GETTING STARTED
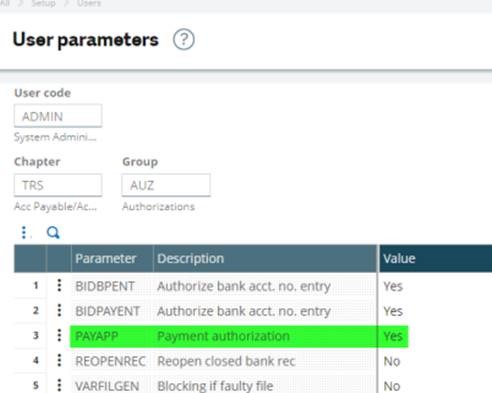
- The first thing we need to do is to identify users that are authorized to approve payments:
- Go to Setup/Users /Users.
- Select the user from the left list.
- Select the Parameters tab.
- Go to Acc Payable/Acc Receivable/ AUZ.
- Select Detail from the action Item.
- Set the PAYAPP – Payment Authorization to Yes for users who will allowed to approve payments.
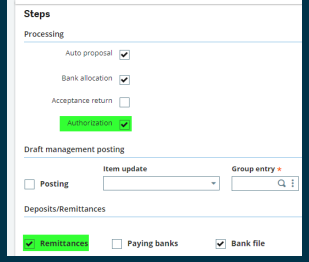
- Next, we need to identify payment types that require approvals:
- Go to Setup/AP-AR Accounting /Payment Entry Transactions.
- Select the payment entry type from the left list.
- Select the Steps tab.
- Select Authorization.
PROCESSING
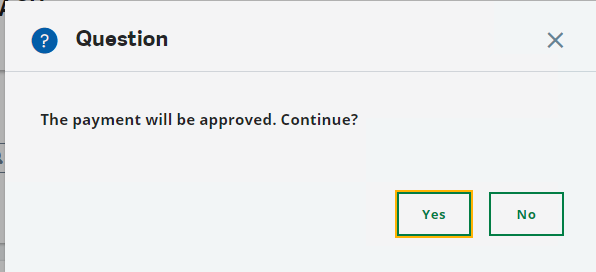
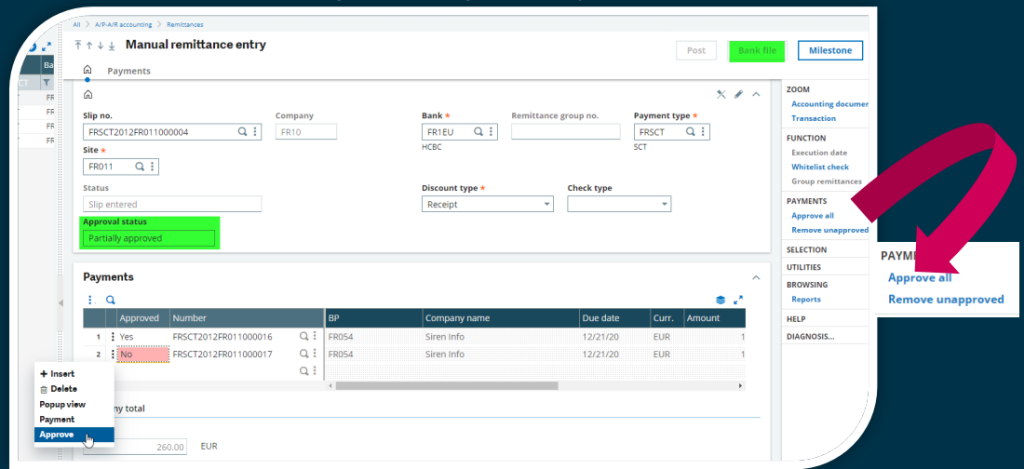
- A payment starts off as unapproved:

- A user with approval rights can approve the payment by clicking the Approve button:
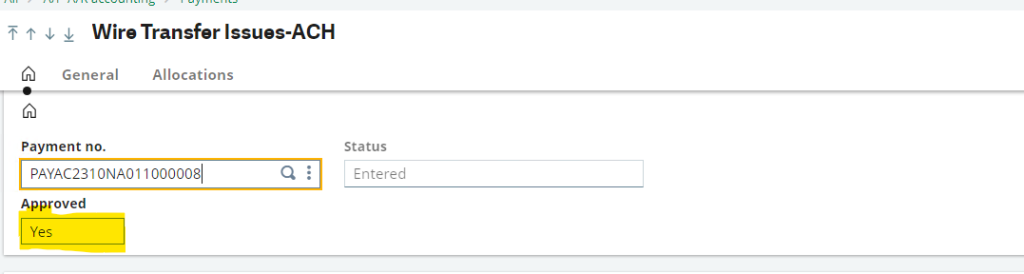
- On a payment remittance, a user with approval security can “Approve All” or “Remove unapproved”. You can also approve individual payments from the action button on the line.
- Unless all payments are approved, the remittance is not available for posting or bank file generation.
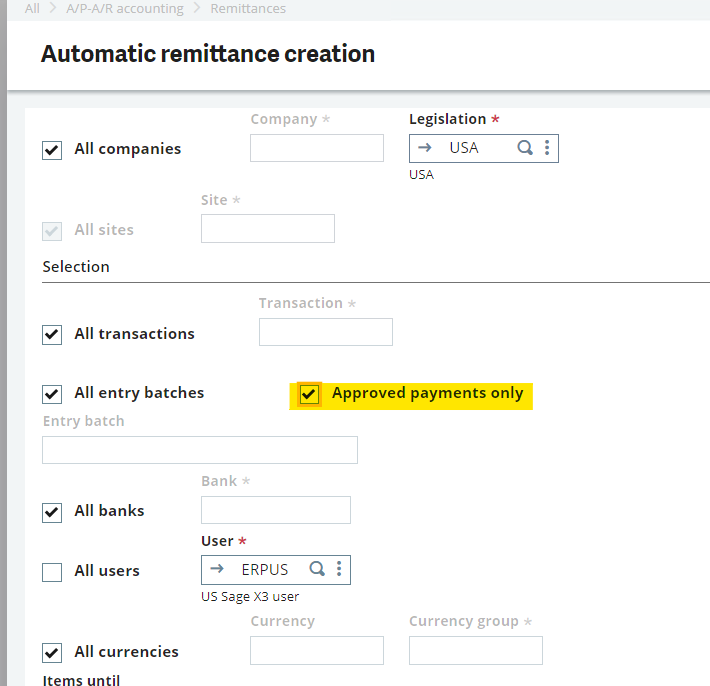
- When generating an automatic remittance, you can select to only include approved payments:
For more information on payment approvals in Sage X3, or for any other Sage X3 questions, please contact us.