Sage Enterprise Intelligence (SEI) Tips & Tricks: Column Formatting in Sage X3
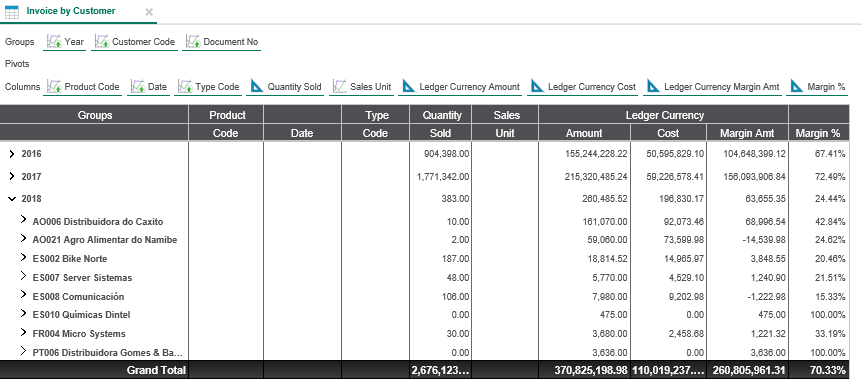
In this post for Sage X3 (now called Sage Enterprise Management) users, we will illustrate how you can add formatting rules to columns defined in the Columns section of a worksheet view in the SEI (Sage Enterprise Intelligence) business intelligence (BI) tool. For example, a rule can be defined to highlight margins above a certain amount in a different color and conversely, a rule can be defined to highlight margins below a predefined amount in a different color.
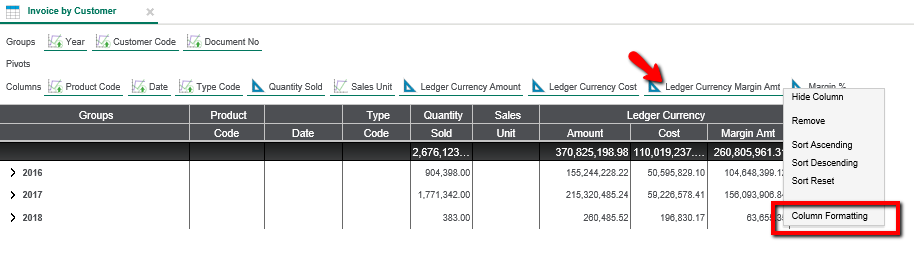
To format a column, right click on the desired field in the Column section of the worksheet view and from the context menu select Column Formatting.
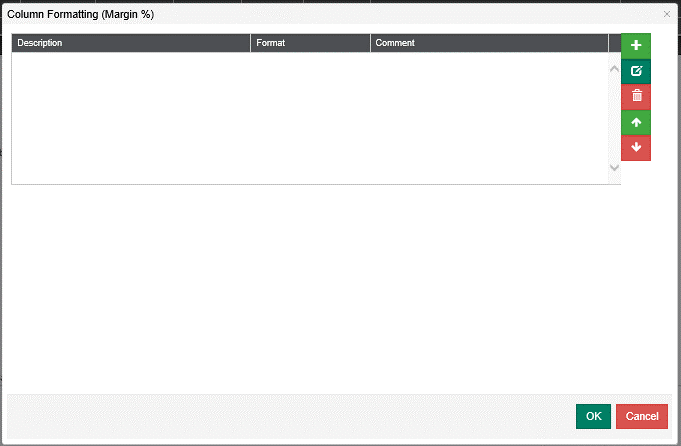
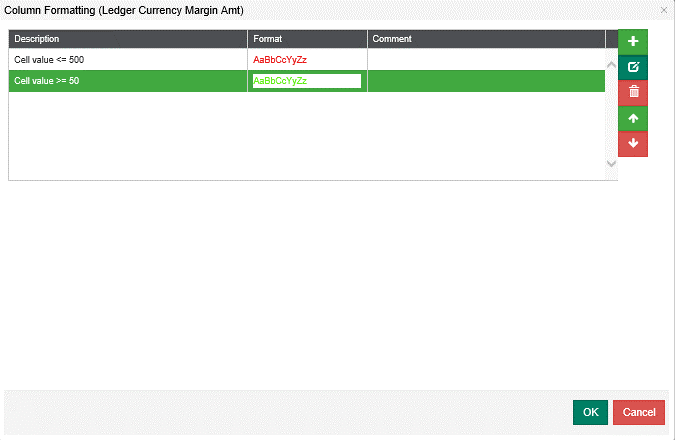
The Column Formatting window will display to define or maintain formatting rules.
To add or define a new rule click the New Rule ![]() button
button
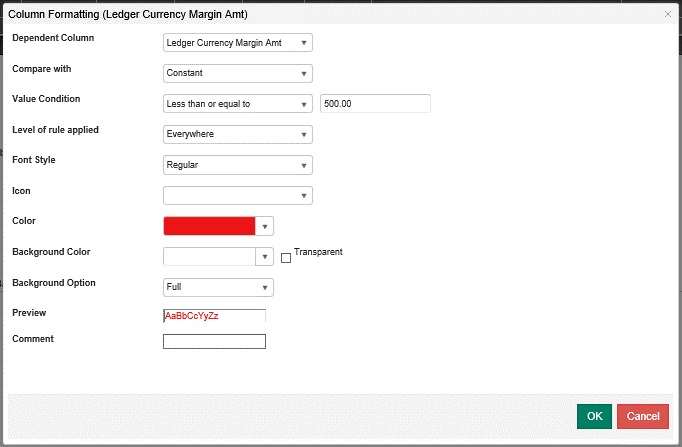
- The rule edit window will appear where conditions on formatting the field/value in the worksheet view are defined.
- Dependent Column defines the column which the rule or condition is based.
- Compare with identifies what the Dependent Column field is compared with. Choices are Constant, Global Variable or Column.
- Value Condition is the test. Choices are Containing, Equal to, Not containing, Beginning with, Is Null, and Ending with. The box to the left of Value Condition is where the “with” value is maintained. The “with” value file will change depending on the Compare with value selected above.
- Level of rule applied allows the user to select the level where the formatting will be applied,
- Everywhere: Will be applied to all the levels of the grid.
- Last Level Only: Will be applied to the last level only (white rows).
- This Group Only: Will be applied to the specific selected group.
- Not This Group: Will be applied to all the groups except the one selected.
- This Group and Lower Level: Will be applied to the specific group and all the subsequent groups selected after the grouping area.
- This Group and Higher Level: Will be applied to the specific group and all the subsequent groups selected before the grouping area
- Font Style: Chose from Regular, Italic, Bold and Bold Italic
- Icon: Choose an optional icon from the following categories directional, emoji, flags, miscellaneous, and shapes
- Color: Select font color
- Background Color: Select cell background color
- Background Option: Choose if the background color is to be applied on the full cell or only partially, based on the cell value or on the percentage that the cell is to the parent value.
- To maintain a rule, click the Maintain Rule
 button.
 - To delete a rule, click the Delete Rule
 button.
 - User the up and down

 arrows to change the order in which the rules are applied.

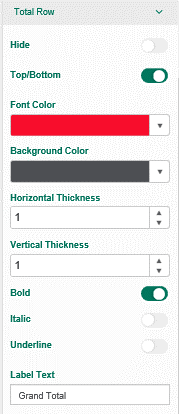
Total Row Formatting
By default, column totals appear at the top of the worksheet view before any content. If you prefer to display totals at the bottom of the worksheet view, there is a worksheet property that will allow you to change the position.

- Settings
- Click the Wrench to open Worksheet Properties
- Worksheet Properties
- Click on Total Row to open properties
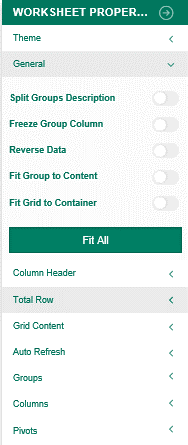
- Total Row
- Click the Top/Bottom button to switch positions
- You can also change the Font and Background Color as well as add Label Text