 Moving a Custom Auto Journal to a New Home
Do you have a custom auto journal that you would like to move from your test environment to your production environment? Are you dreading the time-consuming task of manually keying it in production? And do you fear making a mistake? There is an easier way! In this blog post, we will review how to move a custom auto journal into production.
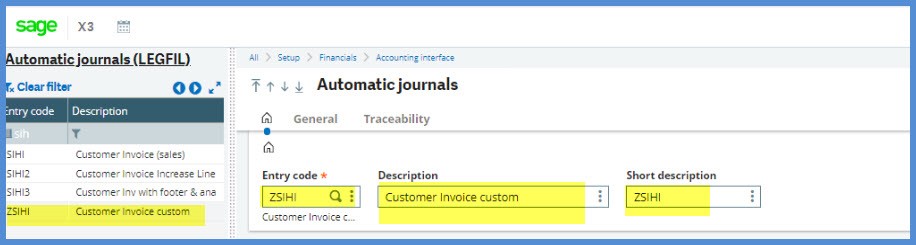
We will start by creating a custom auto journal under Setup, Financials, Accounting interface, Automatic journals (GESGAU) in your test environment. We will customize the SIHI Customer invoice (sales). It is good practice not to modify the out-of-the-box auto journals. We will create a new and unique auto journal code that we can modify. To do this, change the Entry code from SIHI to ZSIHI and click Create.
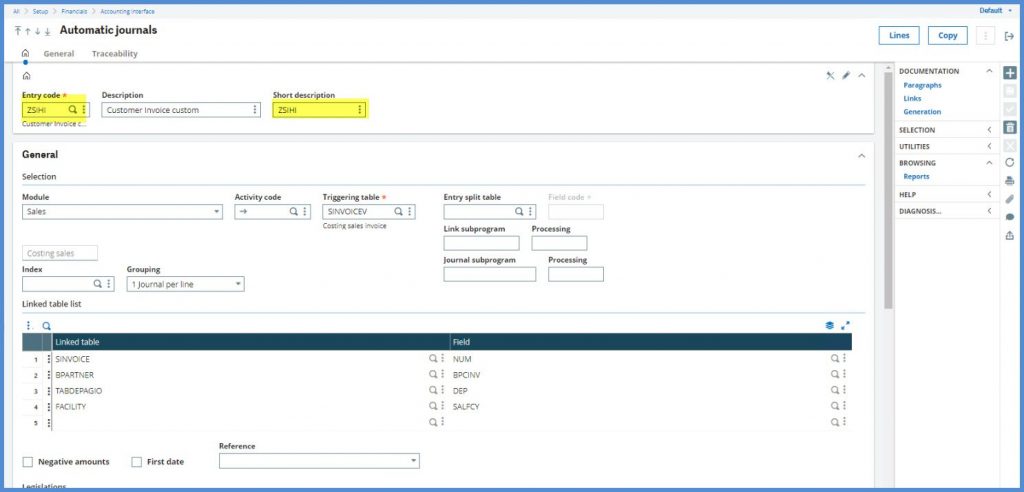
The Entry code ZSIHI is unique in both our production and test folders. We are following the naming convention of beginning customized auto journal codes with the letter “Z.” This naming convention also should be followed whenever customizing screens, windows, objects, etc. Business partners may start their customizations with a “Y” when the customization is completed prior to going live. Following this naming convention is a big help when upgrading so that customizations can be easily identified.
Once you have created the custom automatic journal ZSIHI, make your changes and click Save. Note that we waited to make changes until after the new auto journal was created to preserve the original.
After you have thoroughly vetted the new auto journal in you test environment, it is time to move it to production. There are three alternatives:
- Manually entering in production—this can be time consuming and it is easy to make keying errors
- Use the Copy button on the Automatic journals screen—this only works if the test folder and the production folder are under the same X3 reference folder
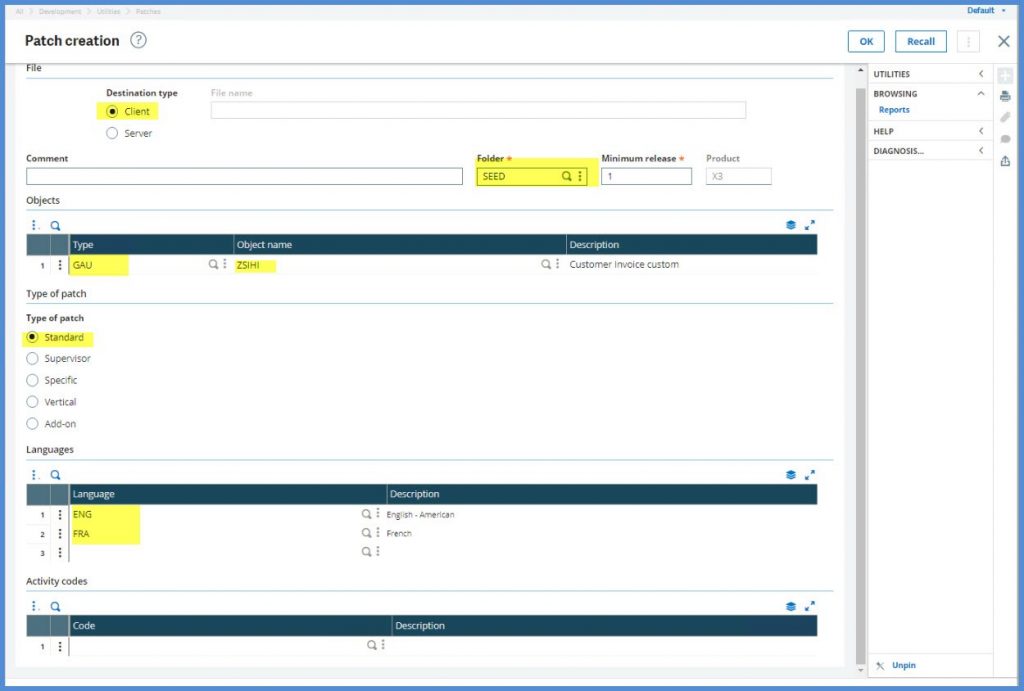
- Create a patch on the test folder and apply the patch to the production folder—we will look at this method
To create an auto journal patch:
- Go to Development, Utilities, Patches, Patch Creation (APATCH)
- Select:
- Destination type = Client
- Folder = Production folder (in this example, the folder is SEED)
- In Objects grid:
- Type = GAU
- Object name = drill down and select our custom journal ZSIHI
- Type of patch = Standard
- Languages grid = leave the default which is typically ENG and FRA
- Leave Activity codes blank
- Click OK
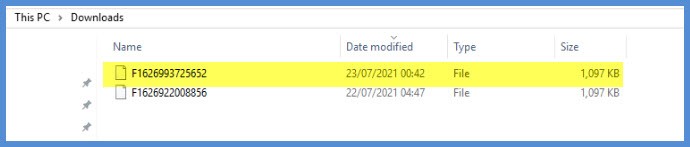
You will find the newly created patch file in the Downloads directory of your PC.
A few warning notes before you apply the patch to your production folder:
- The test folder where you created the patch, and the production folder must be on the same product version and product patch level
- The ZSIHI patch will overwrite any auto journal on the production folder with the same name. This explains why the modified auto journal should have a unique entry code
- Make sure you have a current usable backup just in case there is an issue with the new auto journal that was missed during the vetting process
- Don’t forget to enter this customization on your change log with all the details
- It would be a great idea to store all your patches in one location for safe keeping
Ready to move? Copy the patch file from the test folder to the production folder. I will save the file to the Desktop in my production environment.

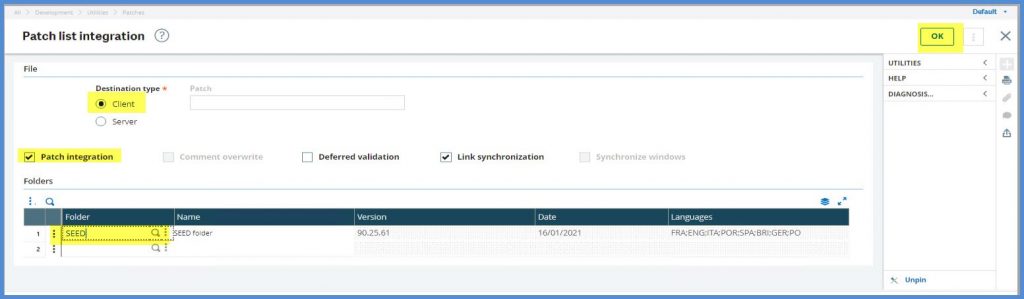
Out next stop is Development, Utilities, Patches, Patch integration on the X3 folder.
- Select Destination type = Client.
- Select Patch integration. If Patch integration isn’t selected, the import is like a test and the data won’t be imported.
- I prefer to clear Deferred validation.
- Under Folders, we will only be selecting the Production folder which in this example is Seed.
- Click OK.
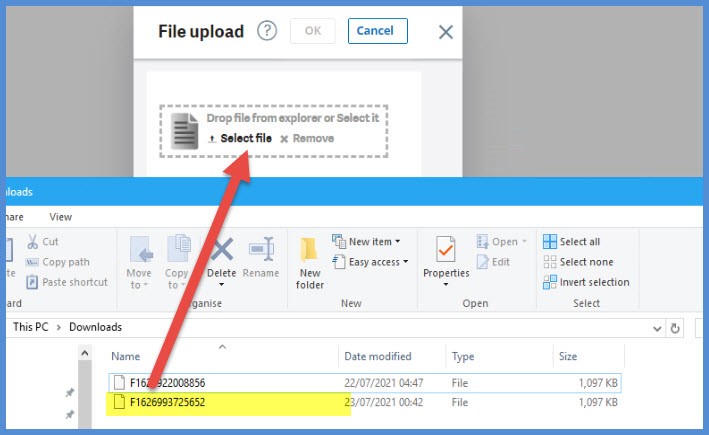
On the File upload screen, drag the patch file to Select file field.
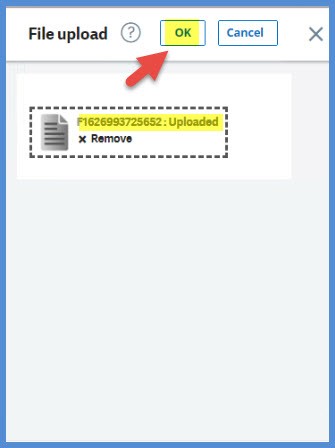
See that our file has been uploaded. Click OK.
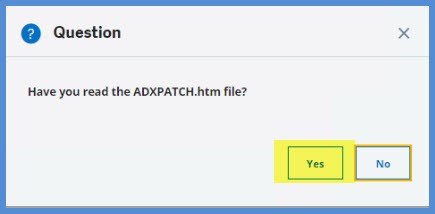
Click Yes in answer to the Question “Have you read the ADXPATCH.htm file?”
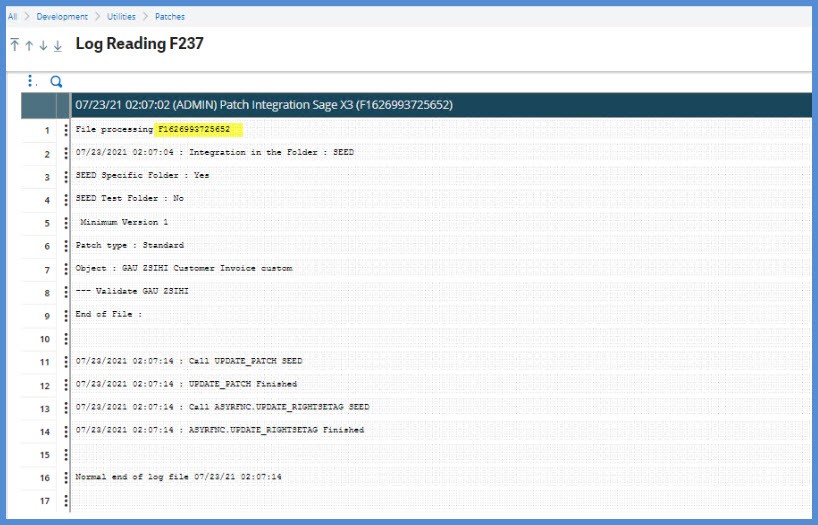
When finished processing, a log file will be displayed.
Return to Automatic journals on the production folder. Note that the ZSIHI is in the left list now.
Outside of moving the new customization to the production folder, you can move custom auto journals from production to a test environment to rework. You can use Patch creation to make patch copies of all your existing custom journals for safe keeping.
The entry transactions, bank file definition and the auto journals are not the only items that can be copied to another environment using Patch creation. Refer to the Online help center entry for the Patch creation function to see all the element types that can be patched.
For additional questions about moving a custom auto journal, or any other questions about Sage X3, please contact us.
Note: Content for this blog post was originally posted on Sage City in Sage X3 Announcements, News, and Alerts by Pam Nightingale, July 23, 2021.